
Changing an armor icon changes the small picture in your inventory. To repaint the armor on a character, give the item a separate worn image with the matching armor layout. Stretching the icon will not move a painted detail onto the right shoulder or chest.
Make one teal-and-gold Harbor Guard chestplate from a blank project. Its dark front border, gold fastener and reinforced back give you clear details to follow from the layered artwork into the constructor preview. You will keep two artwork documents and one constructor project, so each part stays editable.
Choose the image for the job
| What you want to change | Edit this |
|---|---|
| Small picture in the inventory or hotbar | The separate 16 × 16 item icon |
| Painted chest and sleeves on a character | The matching 64 × 32 worn armor image |
| A projecting shoulder or a different silhouette | Geometry; painting does not add a new shape |
| Protection and durability | Equipment settings rather than either image |
The texture editor separates Item texture from Worn armor texture. Choose Chestplate for this worn document. These instructions use the constructor's fixed Bedrock chestplate shape; they do not create independent left and right sleeves or a custom armor mesh. This workflow does not export Java armor.
Paint the chestplate on four named layers
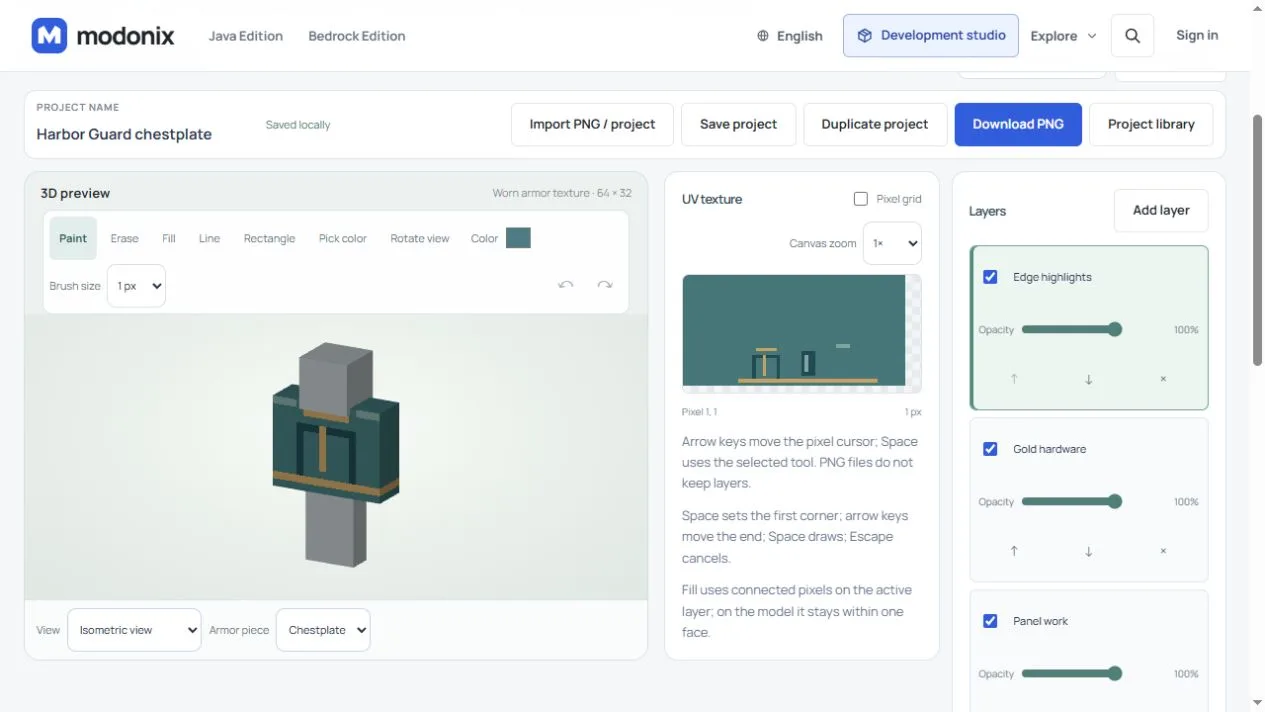
Use New project, select Worn armor texture, choose Chestplate, and name the document Harbor Guard chestplate. Keep the worn image at 64 × 32. The neutral figure in the preview is not painted artwork.
Keep four document layers in this bottom-to-top order: Base, Panel work, Gold hardware, Edge highlights. Leave them visible at 100% opacity. These layers separate the paint so you can revise a fastener without disturbing the torso shading; they are not extra geometric armor shells.
Use teal #477679, navy #234953, gold #c6a166 and the lighter teal #81a6a0. The table uses the editor's visible Pixel X,Y coordinates, starting at 1; both endpoints are included. Use 1 px for the lines and rectangle outlines.
| Layer | Tool and color | From Pixel → To Pixel | Detail |
|---|---|---|---|
| Base | Fill, #477679 |
1,1 | Fill the blank base |
| Panel work | Filled rectangle, #234953 |
21,24 → 28,31 | Dark front border |
| Panel work | Filled rectangle, #477679 |
22,25 → 27,30 | Teal inset |
| Gold hardware | Line, #c6a166 |
22,22 → 27,22 | Neckline |
| Gold hardware | Line, #c6a166 |
24,24 → 24,29 | Front fastener |
| Gold hardware | Line, #c6a166 |
17,31 → 40,31 | Belt across the torso sides |
| Panel work | Filled rectangle, #234953 |
35,23 → 38,29 | Back reinforcement |
| Edge highlights | Line, #81a6a0 |
36,24 → 36,28 | Back panel stitch |
| Gold hardware | Line, #c6a166 |
41,31 → 56,31 | Cuff around the shared arm layout |
| Edge highlights | Line, #81a6a0 |
45,21 → 48,21 | Shoulder highlight |
“Filled rectangle” means draw the outline with Rectangle, then use Fill inside it with the same color. It is not a separate button. For these larger rectangles, fill one pixel right and down from the first corner. Select the named layer before each operation.
To draw precisely with the keyboard, focus UV texture with Tab instead of clicking a pixel just to focus it. Use the arrow keys to reach the first endpoint, press Space, move to the second endpoint and press Space again. Escape cancels an unfinished line or rectangle. With Fill, move to the intended seed and press Space once.
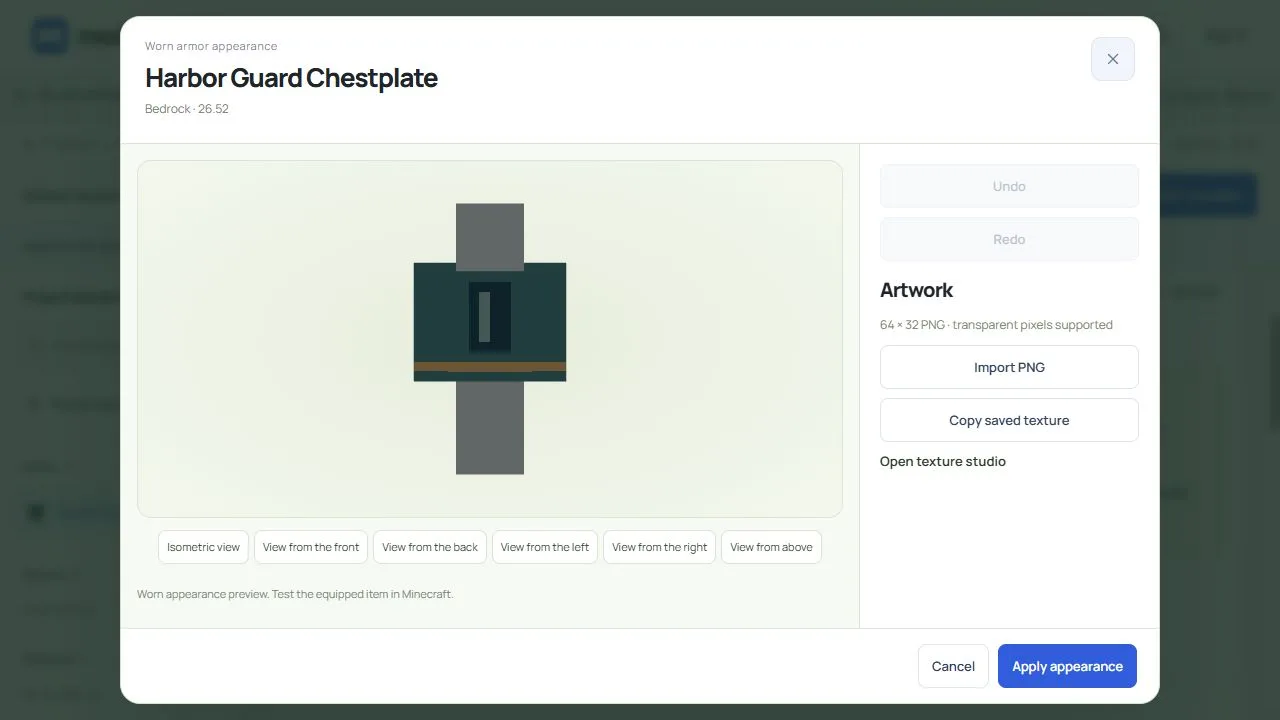
Inspect View from the front and View from the back. The chest front is Pixel 21–28, 21–32; the back is 33–40, 21–32. The arm front is 45–48, 21–32, in a shared mirrored layout. Use Rotate view to inspect the sides without painting. Toggle a layer's visibility to isolate its marks; hidden layers are not included in the flattened image.
Give the inventory its own readable icon
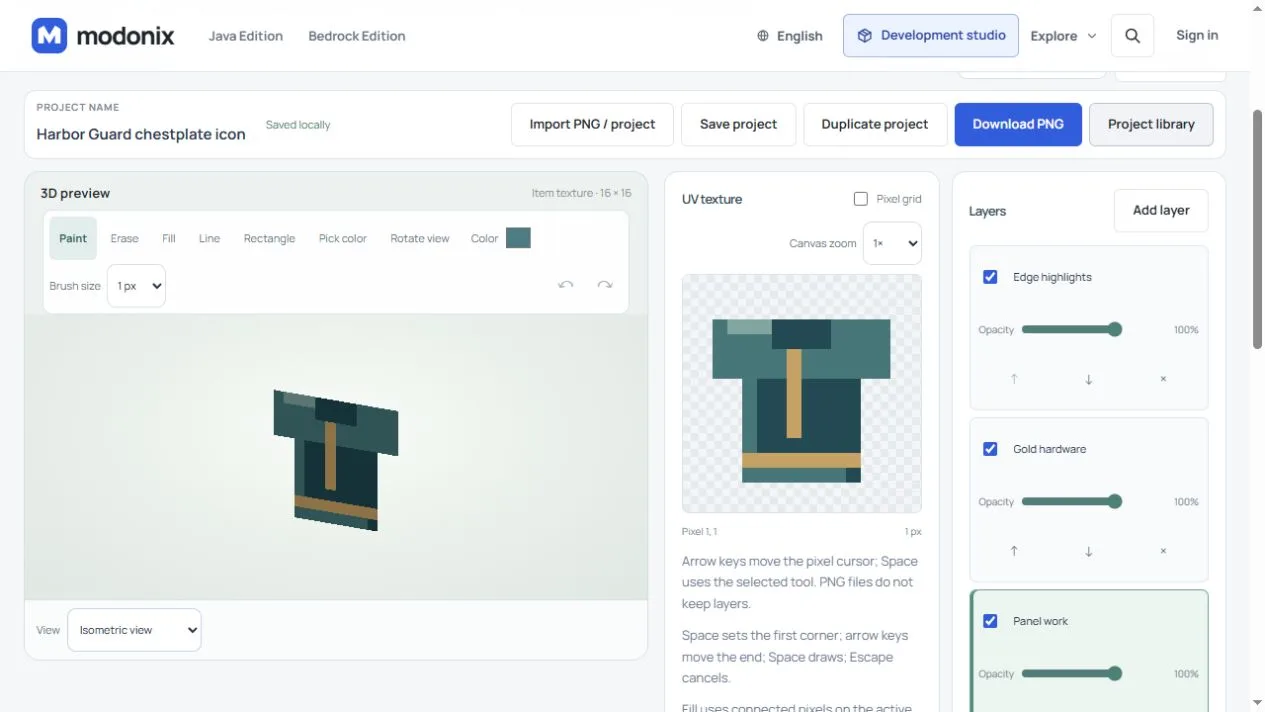
Create a separate 16 × 16 Item texture named Harbor Guard chestplate icon. Keep the same four-layer names. On Base, make the teal shoulders from Pixel 3,4 to 14,7, then the torso from 5,7 to 12,14. Leave the surrounding canvas transparent.
On Panel work, add the navy breastplate at 6,8 → 11,12 and neck recess at 7,4 → 10,5. On Gold hardware, draw the fastener 8,6 → 8,11 and belt 5,13 → 12,13. Add the lighter shoulder line 4,4 → 6,4 on Edge highlights, then the navy side line 12,8 → 12,14 on Panel work. This compact picture belongs in the item texture field, not the worn-appearance dialog.
Use Save project for both documents. Keep their downloaded editable project files as well as their PNGs: the editable files retain the four layers, while each PNG combines visible layers. The browser library is local to that browser. A copied image in the constructor does not remain linked to the original artwork document.
Start a one-item constructor project
Open the constructor. If another project is open, keep a copy with Project → Save project JSON before starting. From Mods & addons, open the New project dialog. Select Mod / addon and Bedrock 26.52, then Create project.
In Project settings, use Harbor Guard chestplate study for Project name, harbor_guard_chestplate_study for Project ID, and 0.1.0 for Version. Enter your creator name in Author. The project ID becomes part of the item's identifier, so keep it consistent while working on this example.
Use Add item. Set Name in game to Harbor Guard Chestplate, Element ID to harbor_chestplate, Item type to Chestplate, and Material tier to Iron. The full identifier is harbor_guard_chestplate_study:harbor_chestplate. This exercise needs one item, with no blocks or crafting recipes.
- In the item's Texture section, use Copy saved texture for Harbor Guard chestplate icon. If you are using the downloaded 16 × 16 PNG instead, use Import texture here.
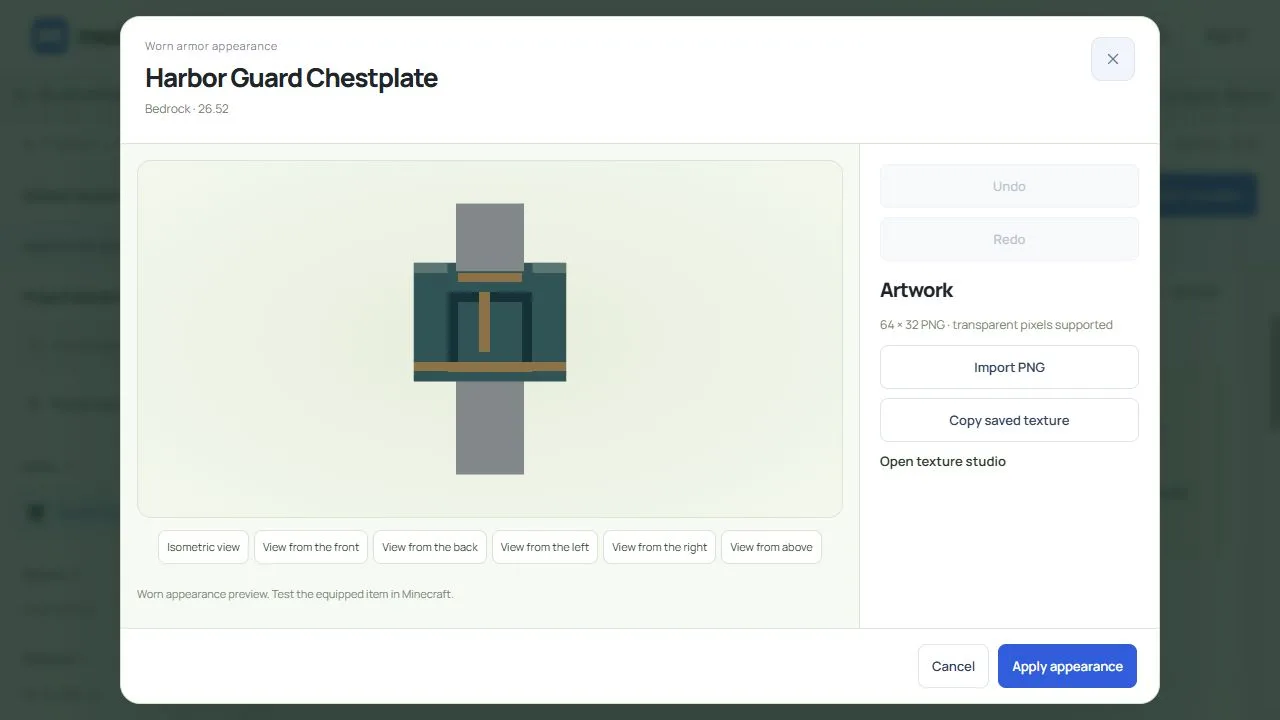
- Open Worn armor appearance → Edit worn appearance. Copy the saved Harbor Guard chestplate worn artwork, then select Apply appearance. Import PNG inside this dialog is the alternative for the 64 × 32 worn PNG.
- Reopen Edit worn appearance. Compare the dark front border and gold fastener with the reinforced back. If you repaint the source later, save it and copy it into the constructor again.
- Use Project → Save project JSON to keep the item and its two copied images. Reopen this saved source with Import project JSON when you want to continue on another browser.
The selected material tier controls equipment properties. Painting this image does not change protection or durability, and this custom worn appearance does not add leather dye or armor-trim overlays. Use vanilla appearance removes the item's custom worn image while keeping its separate inventory icon.
Keep the five working files together
| File | Open it in | What it keeps |
|---|---|---|
Harbor-Guard-chestplate.modonix.json |
Texture editor | Four editable layers for the worn image |
Harbor-Guard-chestplate.png |
Worn appearance dialog | Flattened 64 × 32 worn image |
Harbor-Guard-chestplate-icon.modonix.json |
Texture editor | Four editable layers for the icon |
Harbor-Guard-chestplate-icon.png |
Item Texture section | Flattened 16 × 16 icon |
harbor_guard_chestplate_study.modonix.json |
Constructor | One chestplate, equipment settings and both copied images |
Open the artwork JSON when you want to change a single paint layer. Open the constructor JSON when you want to change the item or copy in your revised artwork. Importing a PNG gives you the combined picture; it does not restore the four layers.
The game export is a separate file. Once you have saved the sources, run Check, then Build .mcaddon and Download game file. If you find a mistake, correct the source or constructor setting and build again; do not patch the finished archive by hand.
Check the worn image, not just the icon
For this example, the constructor puts the icon under textures/items/harbor_guard_chestplate_study/harbor_chestplate.png and the worn image under textures/models/armor/harbor_guard_chestplate_study/harbor_chestplate.png. The resource pack's attachables/harbor_chestplate.json connects the worn image to the chestplate geometry. These are different references even though the two PNGs share the same filename.
Try your exported file in a world copy before using it in a world you value. Compare the inventory icon with the equipped chestplate, then inspect the front, back and moving arms. First person only shows part of the character; use it alongside the other views. Save and reenter normally before relying on persistence.
If the icon looks right but the worn artwork has not changed, check the selected worn document, Apply appearance and which exported pack is active. If colors appear on the wrong face, return to the Chestplate layout and its UV regions. Changing the icon again will not fix either issue.
A helmet, leggings or boots need their own matching layout and separate artwork; the chestplate image is not a complete outfit. Java also needs its own version-dependent equipment definitions. Reusing a PNG does not supply those definitions, and renaming a Bedrock archive does not convert it. For a separate block-making workflow, see the Glassworks lesson.
Comments 0
Share what worked, ask for help or reply to another player.
Use your Modonix account to join the discussion and manage your comments.
Sign in to commentNo comments yet. Share what worked for you.