
Make your first Bedrock resource pack small enough that you can see exactly what changed. This lesson replaces ordinary dirt with an original brown texture containing four turquoise pebbles. The block remains dirt: you select it from the inventory and place it normally. A single texture is enough to learn the folder layout, draw a repeating pattern and switch your work on inside one world.
Try the finished example
The Files section contains Modonix-First-Dirt-Texture-0.1.0.mcpack and Modonix-First-Dirt-Texture-0.1.0-source.zip. The first is the ready resource pack; the second contains its editable PNG, manifest, instructions and original pixel generator. Both the example texture and code use the MIT license included with the source.
Our example runs on Windows Bedrock 26.52. It needs no behavior pack, script, Beta API experiment or shader. Open the .mcpack with Minecraft and wait for the import message. Then edit a spare world and select Resource packs → Available → Owned. Find Modonix First Dirt Texture and select Activate.
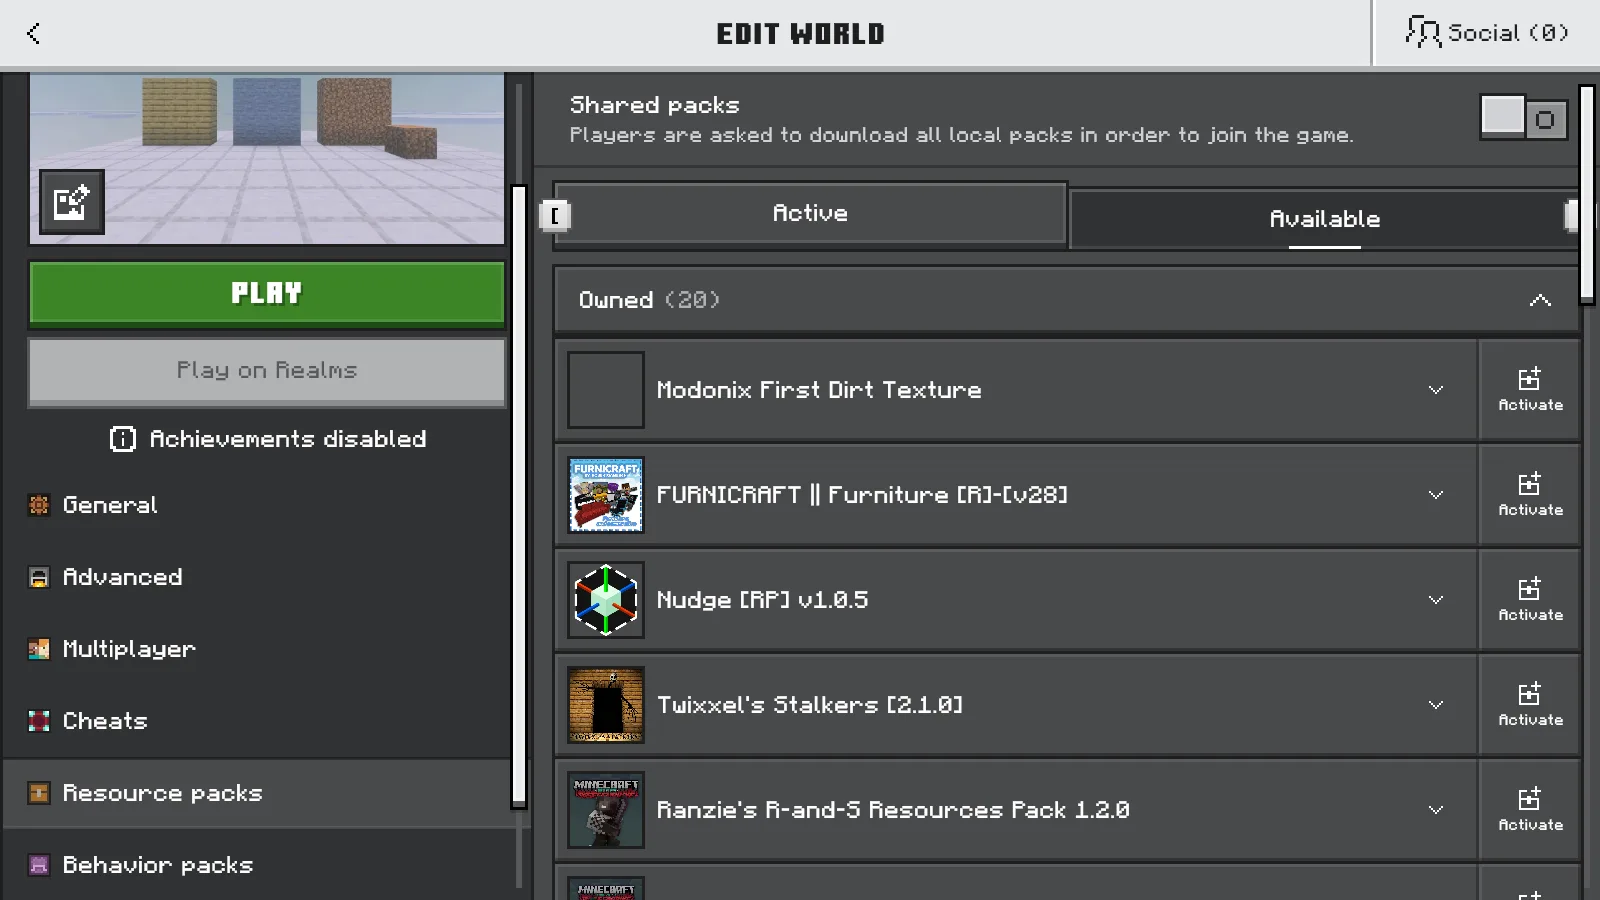
The example is available under Owned with an Activate control.
Confirm it appears under Active. Press the Back arrow at the top left until you return to Worlds, then open the world from that list. Use the same route after removing the pack. Returning to Worlds is the step that saved our activation changes in the 26.52 interface.
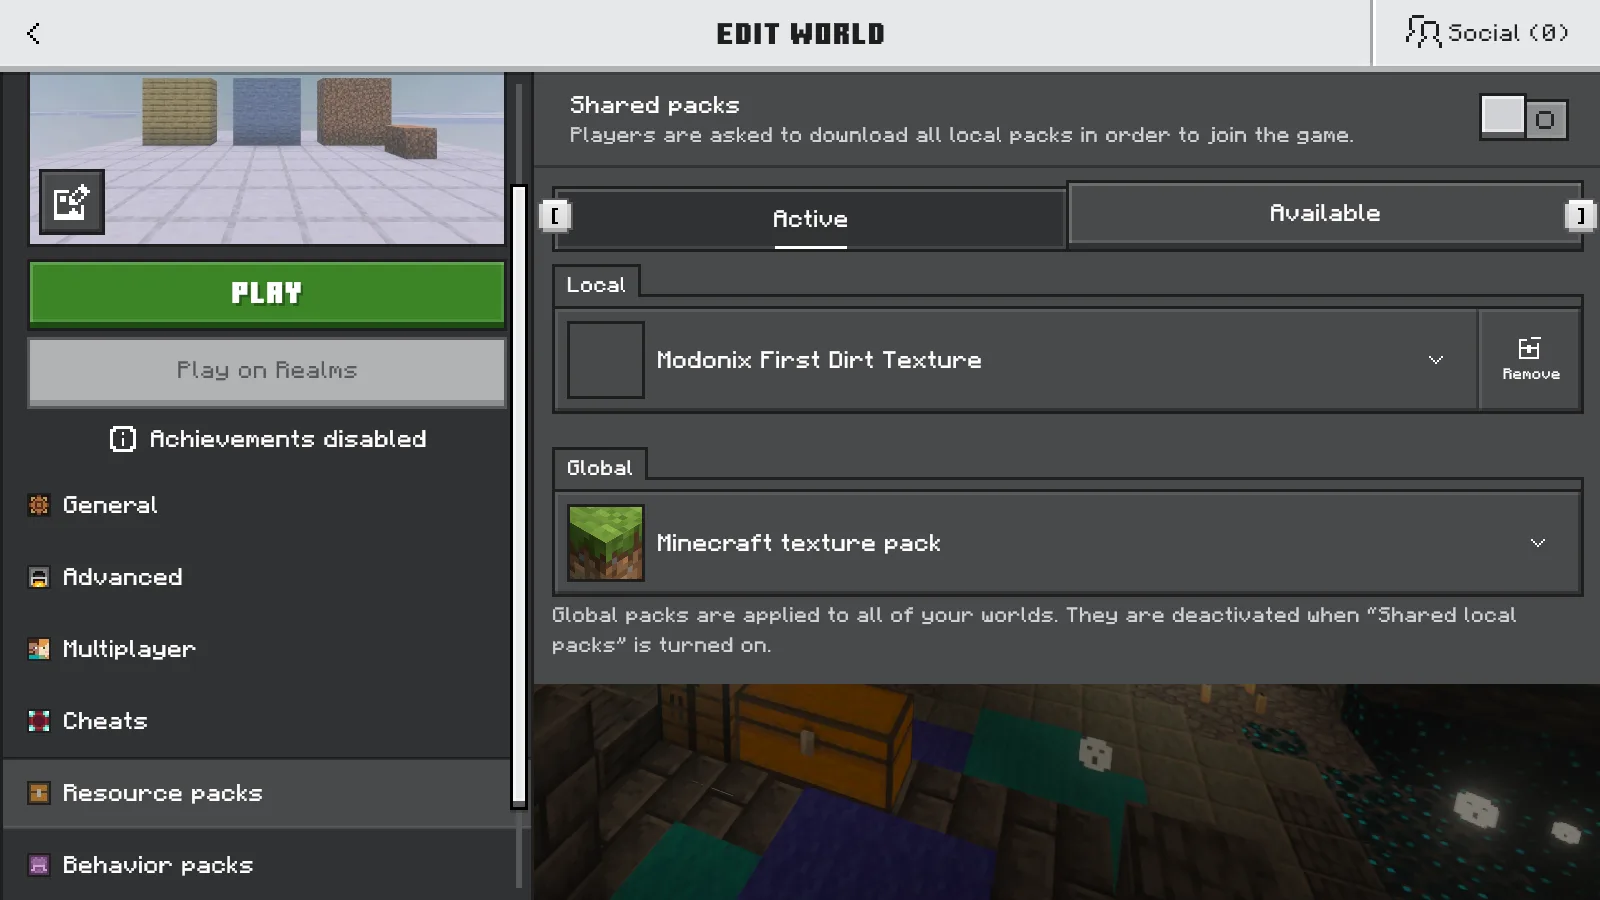
Modonix First Dirt Texture is active locally for this world. Use the upper-left Back arrow before reopening.
Draw a readable sixteen-pixel texture
Extract the source ZIP into your own working folder. Open pack/textures/blocks/dirt.png in a PNG editor, or create a new 16 × 16 pixel image. Zoom in to see individual squares; keep the actual canvas at sixteen pixels in each direction.
Choose a one-pixel pencil with hard edges. Fill the image with a middle brown, then add small clusters of darker and lighter brown. Keep the surface fully opaque. For an unmistakable first experiment, add four small turquoise clusters, each about two pixels across, away from the outer edges. Save as PNG, with the exact filename dirt.png.
Look at a tiled preview if your editor offers one. Long dark lines along an edge will repeat into a grid across a wall. A few irregular patches usually make the repeat less obvious. Our bright pebbles are deliberately easy to spot; once the pack works, try a quieter palette for a building project.
Keep the pack folder simple
The pack itself has only two files:
pack/
  manifest.json
  textures/
    blocks/
      dirt.png
Keep the spelling and nesting shown here. The replacement works because the PNG uses the ordinary dirt texture's path. You do not need to create a new block definition or edit a saved world.
The supplied manifest is:
{
  "format_version": 2,
  "header": {
    "name": "Modonix First Dirt Texture",
    "description": "One original 16x16 dirt texture with turquoise pebbles. Modonix learning sample.",
    "uuid": "82e2b217-82ee-4e2c-a042-77a2fbded378",
    "version": [0, 1, 0],
    "min_engine_version": [1, 21, 0]
  },
  "modules": [{
    "type": "resources",
    "uuid": "4e0dd58a-0b5c-43fb-8c28-66ae2142c07c",
    "version": [0, 1, 0]
  }],
  "metadata": {"authors": ["Modonix"], "license": "MIT"}
}
The two UUIDs identify this example. For a separate project, change the name, description and author, and replace both UUIDs with two different new values. On Windows, running [guid]::NewGuid().ToString() twice in PowerShell generates them locally. Keep each value inside the quotation marks. The minimum-engine field is a declared lower bound; our demonstrated game version is 26.52.
Package your own edit
Select the contents of pack, compress them into a ZIP and rename the result with a .mcpack extension. When you open the archive, manifest.json should be at its top level, beside textures. An extra enclosing pack folder is an easy mistake to catch here.
For later edits to the same project, keep your two UUIDs. Before importing again, increase both the header and module versions—for example, from [0, 1, 0] to [0, 1, 1]. Repackage the files, import the updated .mcpack, and activate it again if needed. Minecraft replaces an imported pack only when the new version is higher; keeping the same or a lower version can leave your earlier texture in place.
Import your named pack and activate it in the spare world. Keep other dirt replacements inactive while learning. If the pack is missing from the list, check that the manifest is named manifest.json, not manifest.json.txt. If it appears but dirt looks unchanged, check the PNG path and whether another active resource pack overrides it.
Compare the same blocks
Build a small dirt panel beside stone and oak planks. Place one extra dirt block in front so you can inspect its top and sides. Save & Quit, remove the sample from the world's Active resource packs, return to Worlds and reopen. This is our ordinary-dirt control:
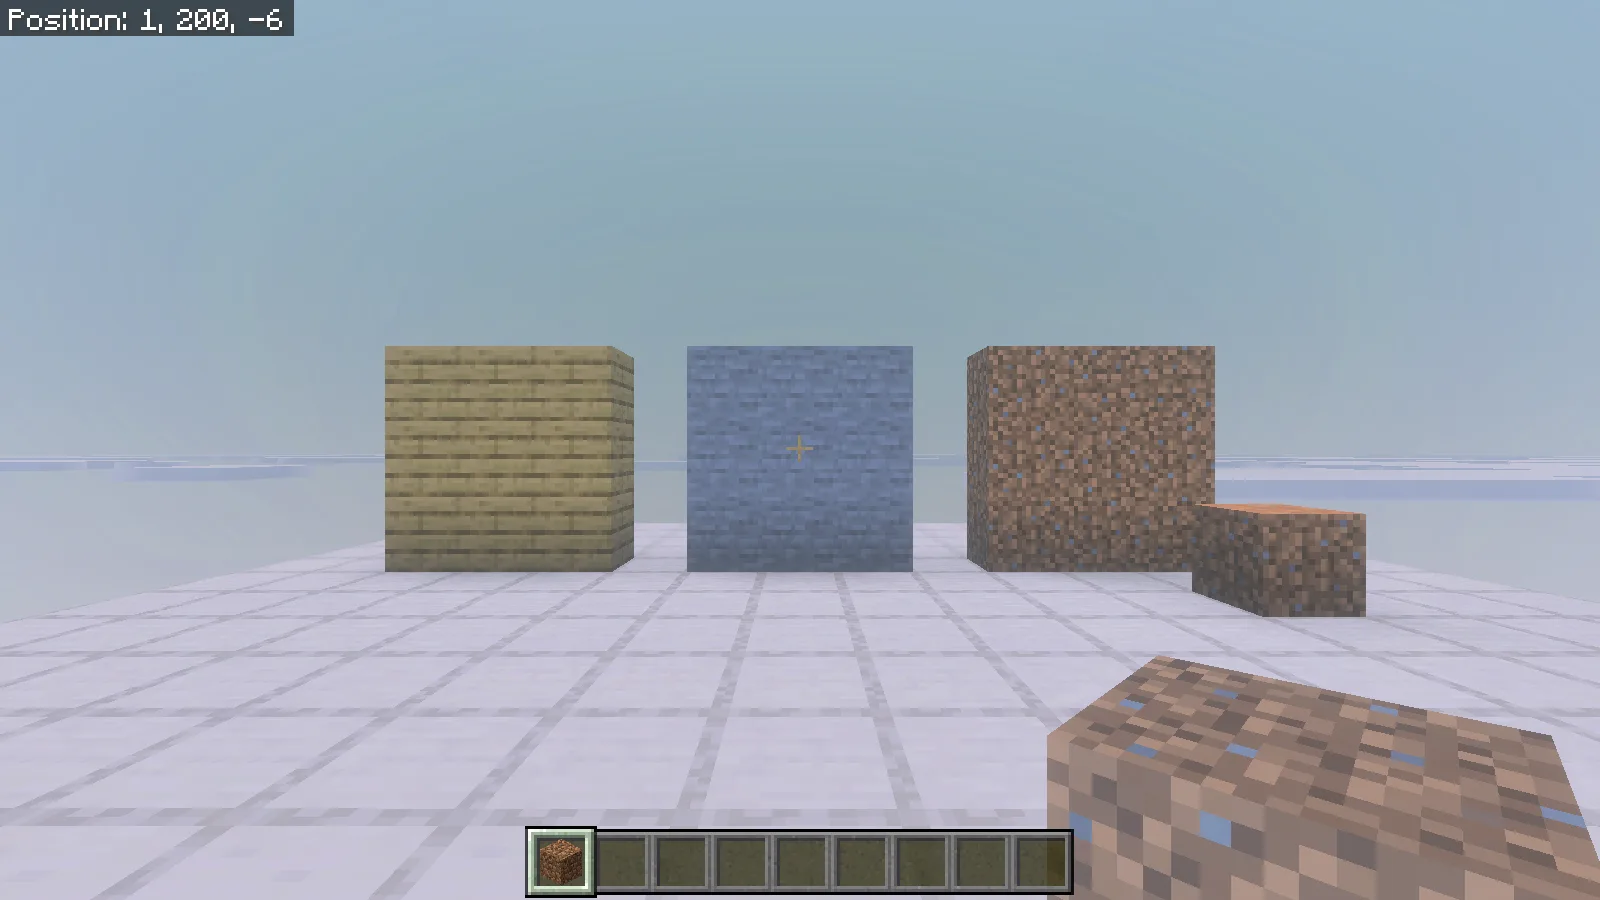
With the pack removed and the world reopened, the dirt panel and extra block use ordinary brown dirt.
Activate the pack again, return to Worlds and reopen at the same viewpoint. Our dirt gained the turquoise pattern; the neighboring stone and oak kept their appearance.
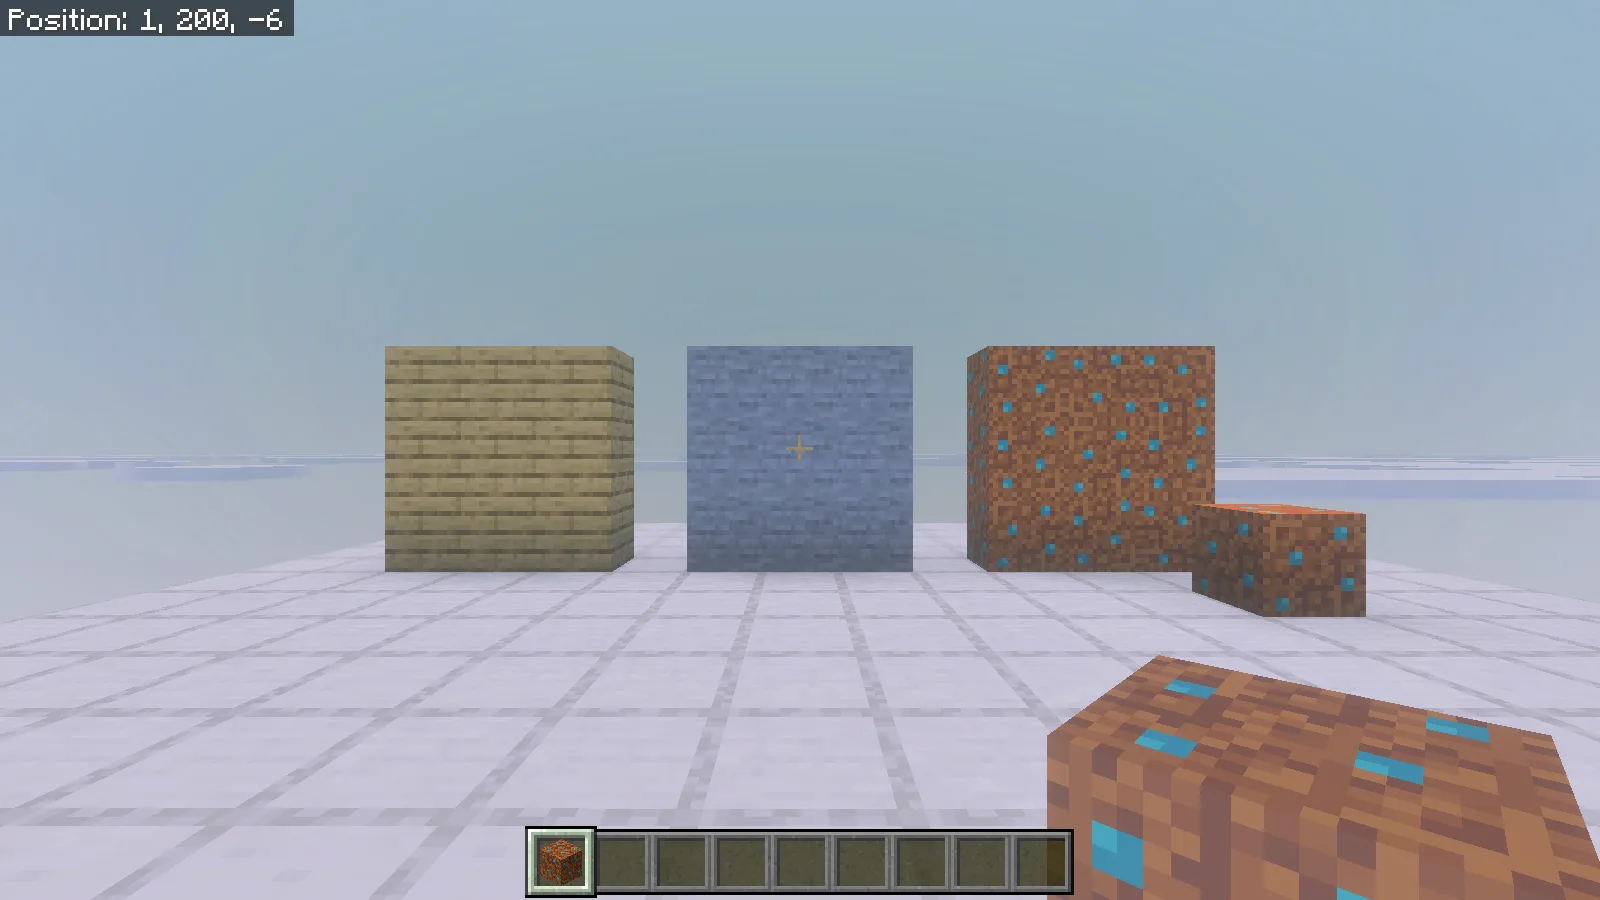
The same camera and block layout after activation: dirt gains turquoise pebbles while the stone and oak remain unchanged.
The extra block was placed with the ordinary dirt item. Its top, sides, held item and inventory icon all show the new pattern.
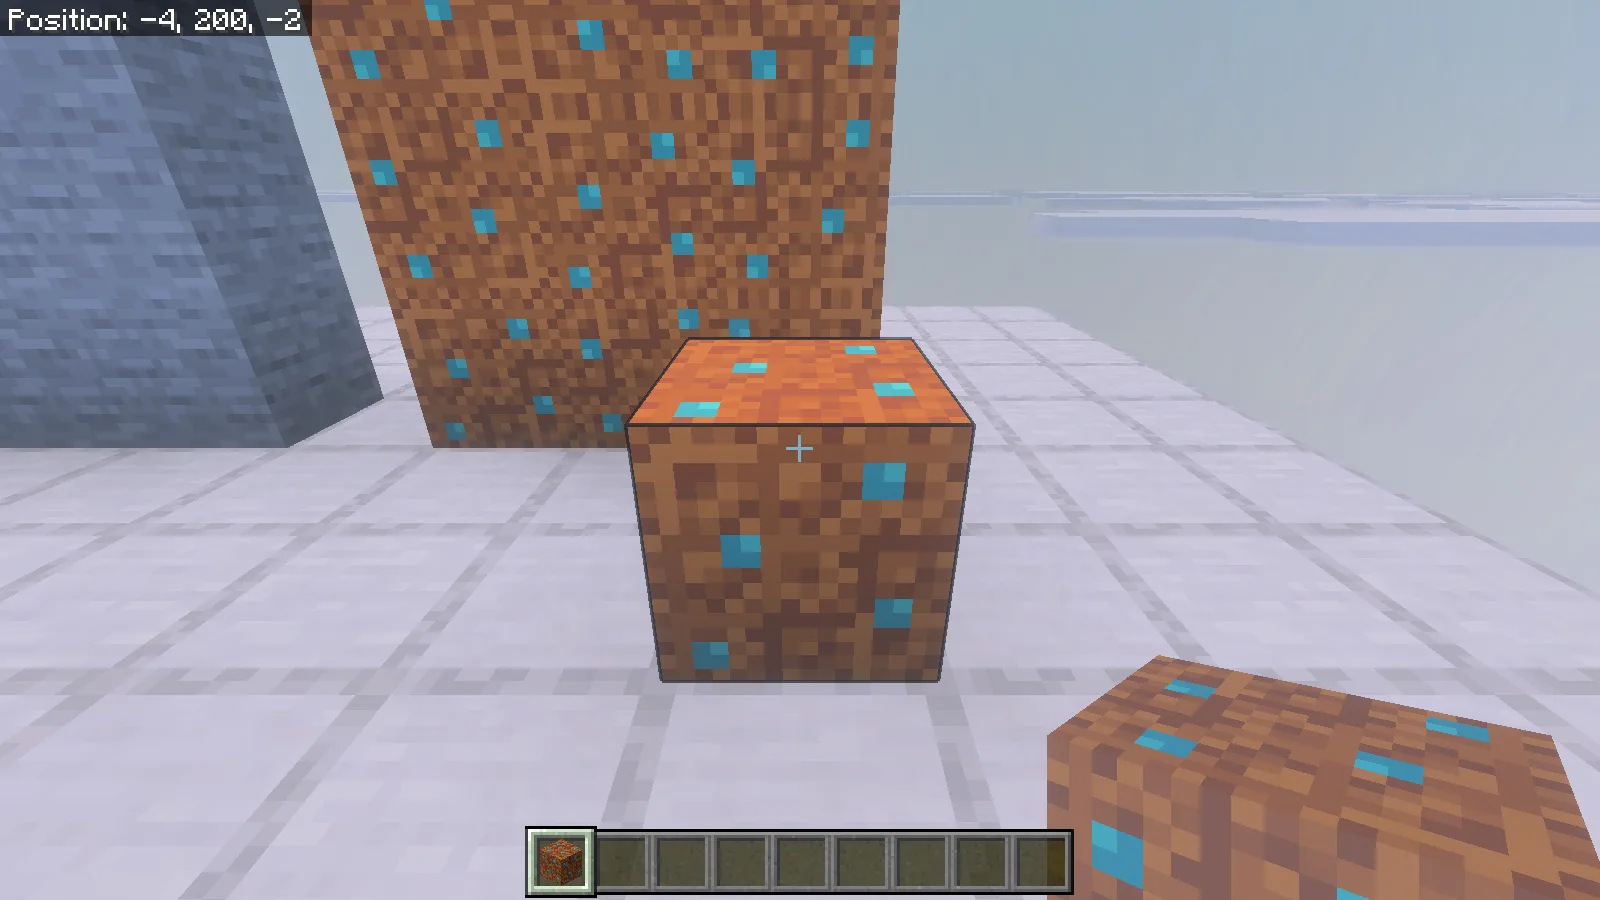
A close view of the ordinary dirt block placed by hand, now using the original sample texture.
Once that loop is familiar, make one deliberate change to your PNG and repeat it. Work on the texture, inspect it on several adjacent blocks, then decide whether the color and repeat suit your world.
Comments & questions
Share what worked, ask for help or reply to another player.
No comments yet. Share what worked for you.