
Build Tidekeeper skin: a teal jacket with dark seams and gold trim, dark navy trousers, brown hair, and a gold scarf. Keep the clothing, face, and scarf on named layers, then save an editable project and export a 64 × 64 PNG. A later scarf change can stay separate from the jacket underneath.
Open the Modonix skin editor. This lesson finishes with artwork files; choosing and applying a skin in Minecraft is a separate step.
Choose the arms before painting
Choose Skin under Create new, then select New project. Name this example Tidekeeper skin, keep Artwork type set to Skin, and choose Classic · 4 px under Arm model. The editor offers two arm layouts:
| Model | Arm width | Image size |
|---|---|---|
| Classic · 4 px | Four pixels | 64 × 64 |
| Slim · 3 px | Three pixels | 64 × 64 |
Select Create project. Both models use the same image dimensions, but the arm regions differ. Switching Arm model changes how the preview uses those regions; it does not redraw your sleeves to fit. Choose the intended model first, especially when starting from a PNG whose arm layout you already know.
Build the outfit on named layers
Keep the supplied Base layer and add three layers with Add layer. Rename them to match their jobs, leaving Visible enabled and Opacity at 100%:
| Document layer | Details in this example |
|---|---|
| Base | The starting skin, including the teal shirt and dark trousers |
| Jacket tailoring | Dark jacket seams, gold cuffs, buttons, and belt |
| Face and hair | Brown fringe, eyes, and mouth |
| Outer scarf | Gold scarf on the skin's outer surface |
- Choose View from the front. Turn off Show outer layer while checking the body and jacket beneath it.
- Select Jacket tailoring in Layers and work on UV texture, the flat image wrapped around the character. Use Line and Brush size — 1 px for the precise strokes below. Use Undo for an unwanted mark.
- Add seams and gold trim over the starter’s teal shirt. Switch to Face and hair before drawing the fringe, eyes, and mouth, so those changes stay separate from the clothes.
- Select Outer scarf for the scarf strokes below. Turn Show outer layer on to inspect the result in 3D. Leave the surrounding pixels transparent so the jacket remains visible.
- Review View from the back and the side views. Turn Visible off and on for Outer scarf to inspect the jacket underneath without deleting the scarf. Rotate view moves the view without painting.
Four lines you can reproduce
The coordinates below use the visible Pixel counter, starting at 1. Choose Line, set Brush size to 1 px, and enter the listed Color. Press Tab until the UV texture canvas has the visible keyboard-focus outline. Move the cursor with the arrow keys to the first position and press Space to set the first endpoint. Move to the second position and press Space again to draw. Escape cancels an unfinished line. Select the indicated layer before each stroke.
| Layer | Color | From Pixel | To Pixel |
|---|---|---|---|
| Jacket tailoring | #234953 |
21, 21 | 21, 32 |
| Jacket tailoring | #c6a166 |
21, 30 | 28, 30 |
| Outer scarf | #e8ba70 |
21, 37 | 28, 37 |
| Outer scarf | #e8ba70 |
26, 39 | 26, 41 |
The first two lines make a dark left seam and a gold belt. The last two make the front neckline and short end of the gold scarf. These are four useful starting strokes; add the cuffs, buttons, and face details on their own named layers.
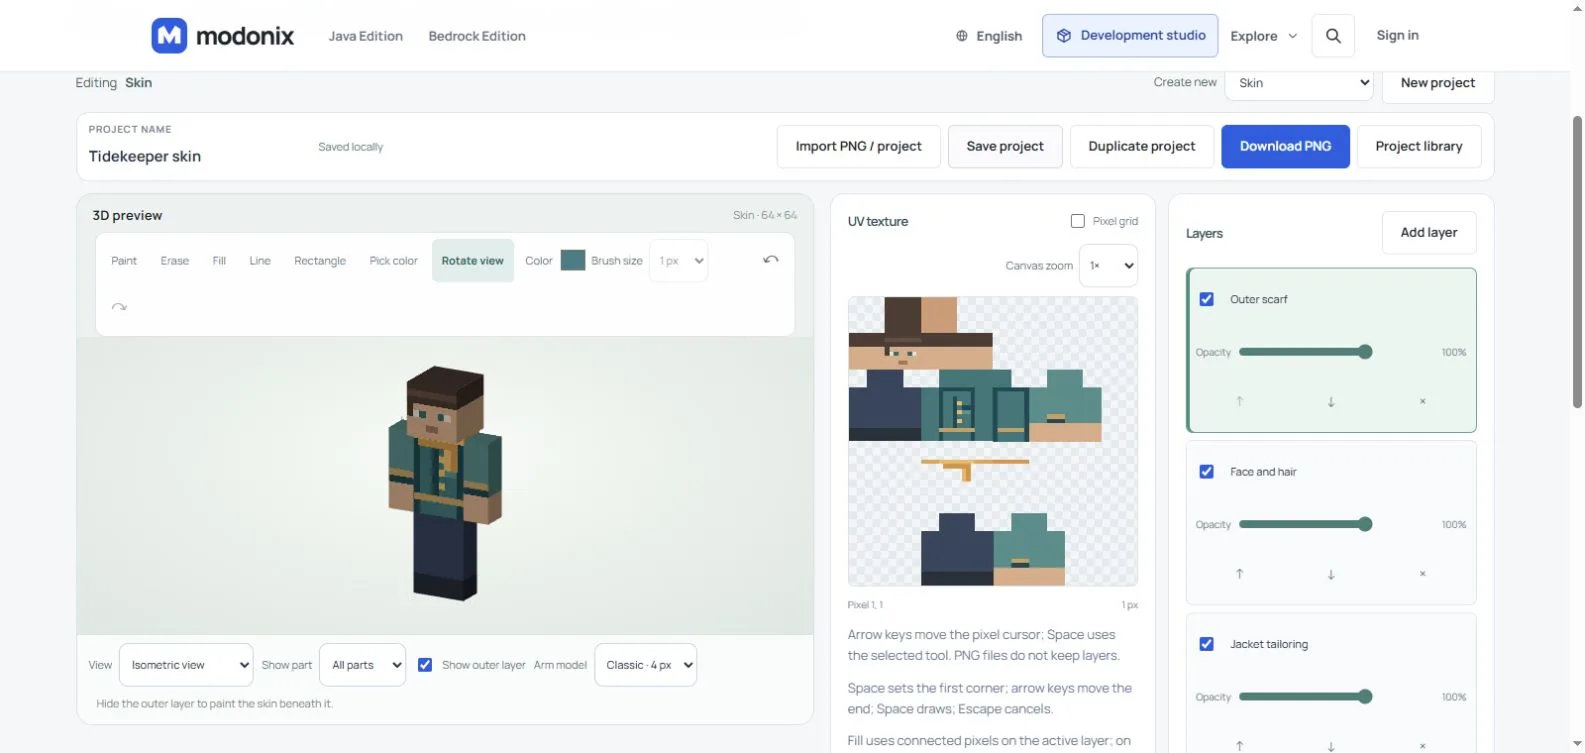
Pixel grid and Canvas zoom help with individual pixels; they do not enlarge the exported skin. Fill affects connected pixels on the active document layer. On the 3D model, it stays inside the selected face, so it does not recolor the whole outfit at once.
Two different kinds of layer
The Layers panel holds editable sheets of artwork. The scarf on its own sheet can be hidden, recolored, or erased without changing the jacket on the sheet below.
The skin's outer layer is the slightly raised surface used for details such as a jacket or a hat. It has its own regions in the same 64 × 64 image. Adding a document layer does not add another 3D shell. On the UV canvas, pixel positions determine whether a detail belongs to the base or outer surface; naming a layer Outer scarf does not move its pixels there.
Keep the visible base-body faces filled. Leave transparent gaps around outer details wherever you want the base skin to show through. Erase removes pixels from the active document layer, so check which layer is selected before using it.
Show outer layer controls the 3D preview and which surface you can reach while painting. Turning it off does not remove outer-skin pixels from the PNG. Hiding a document layer with Visible, however, does affect the exported image.
Keep the editable file as well as the PNG
| Action | What it keeps | Use it for |
|---|---|---|
| Save project | An editable copy in this browser's project library | Returning to the same project here |
| Download editable project | A .modonix.json file with the artwork layers and arm-model choice |
A portable backup you can reopen in this editor |
| Download PNG | One flattened 64 × 64 image of the visible document layers | The finished skin image |
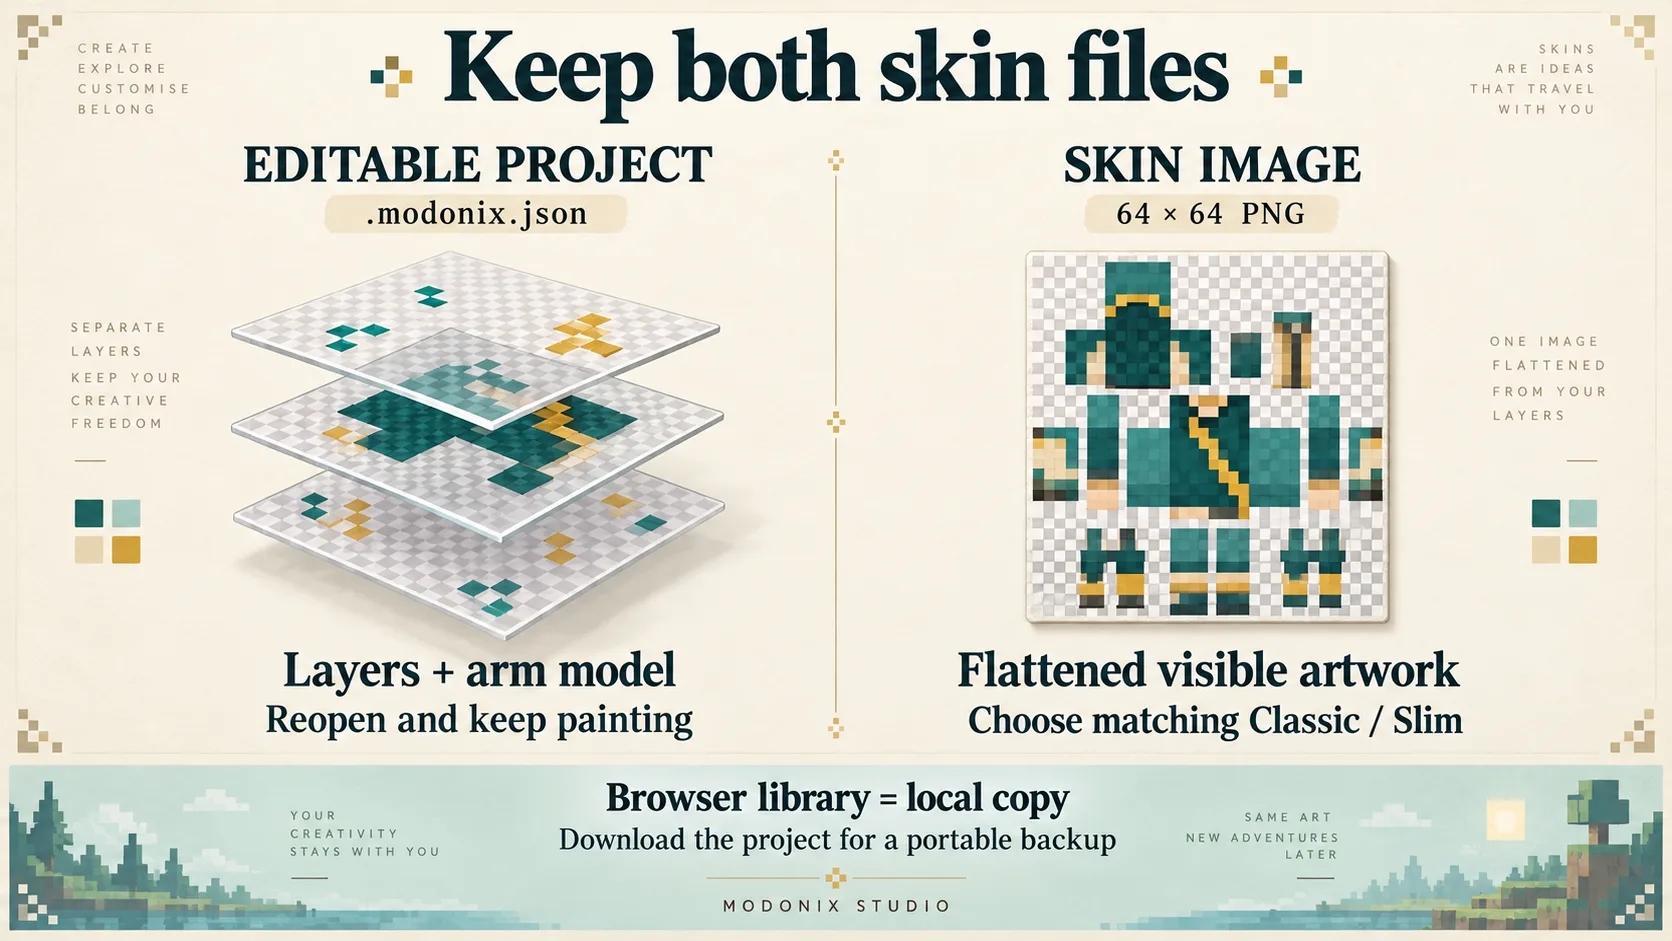
Select Save project and wait for Saved locally. Open Project library, find Tidekeeper skin, and select Open artwork project. Check that all four named layers are still there before continuing.
Download the editable project too. The browser library is local to this browser; it is not a portable backup. If the editor reports that local storage is unavailable or full, use Download editable project to keep your work as a file.
Reopen the source and make a second version
Select Import PNG / project and choose the .modonix.json you downloaded. If the editor asks what to do with unsaved work, save it or download an editable copy before continuing.
The JSON restores all four named layers. Scroll Layers to check the whole list; these two views show its upper and lower parts.
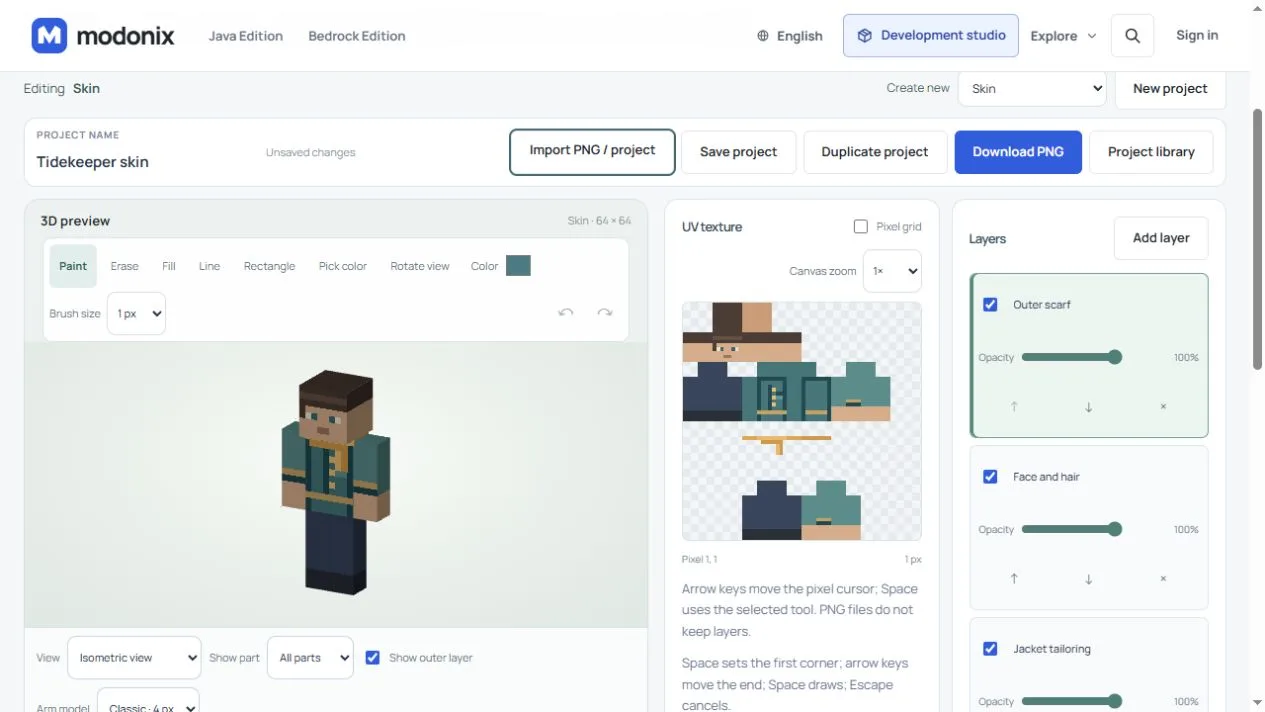
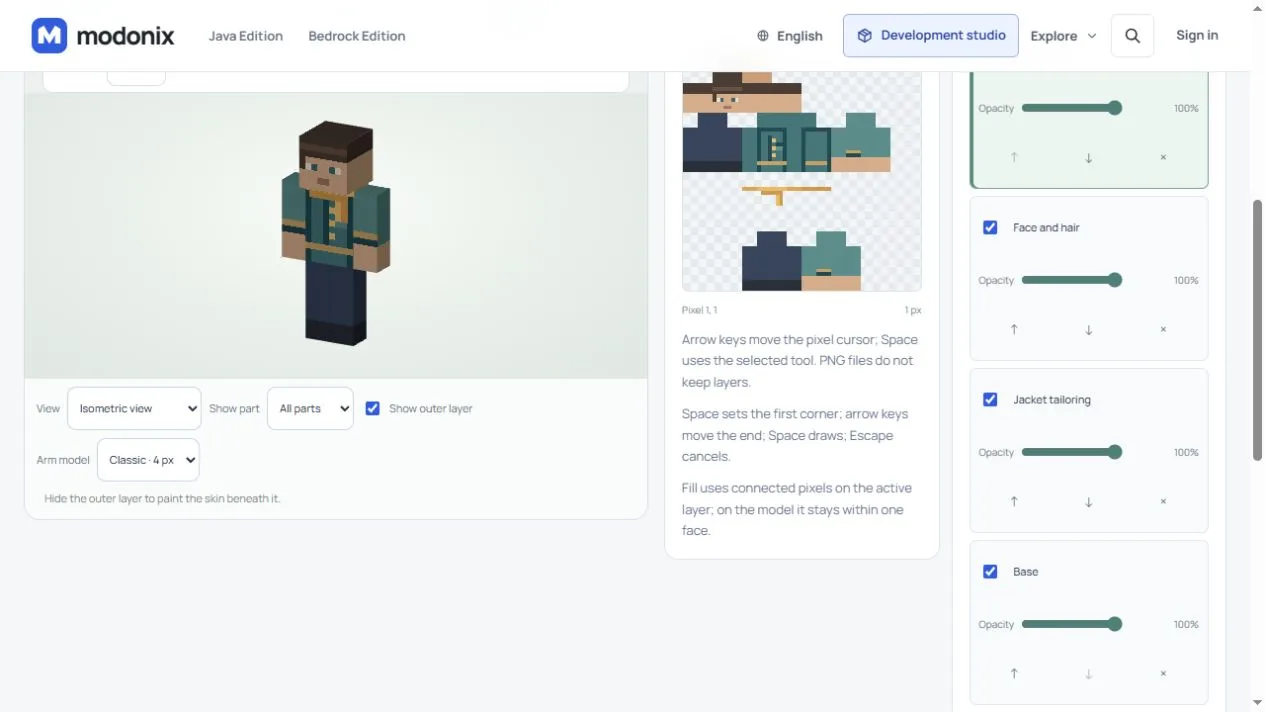
The imported project keeps its separate layers. Give this version a different Project name, select Outer scarf, and change a small part of the scarf's color. Save it and download both files again so that the editable source and finished PNG represent the same version.
Importing the PNG instead produces a single Base layer. The visible design comes back, but the separate jacket, face, and scarf layers do not. For a PNG import, first select the matching Skin format and Arm model; the file must be 64 × 64.
Compare Layers here with the editable project above: only Base remains. Continue from the JSON when you need to edit the scarf separately.
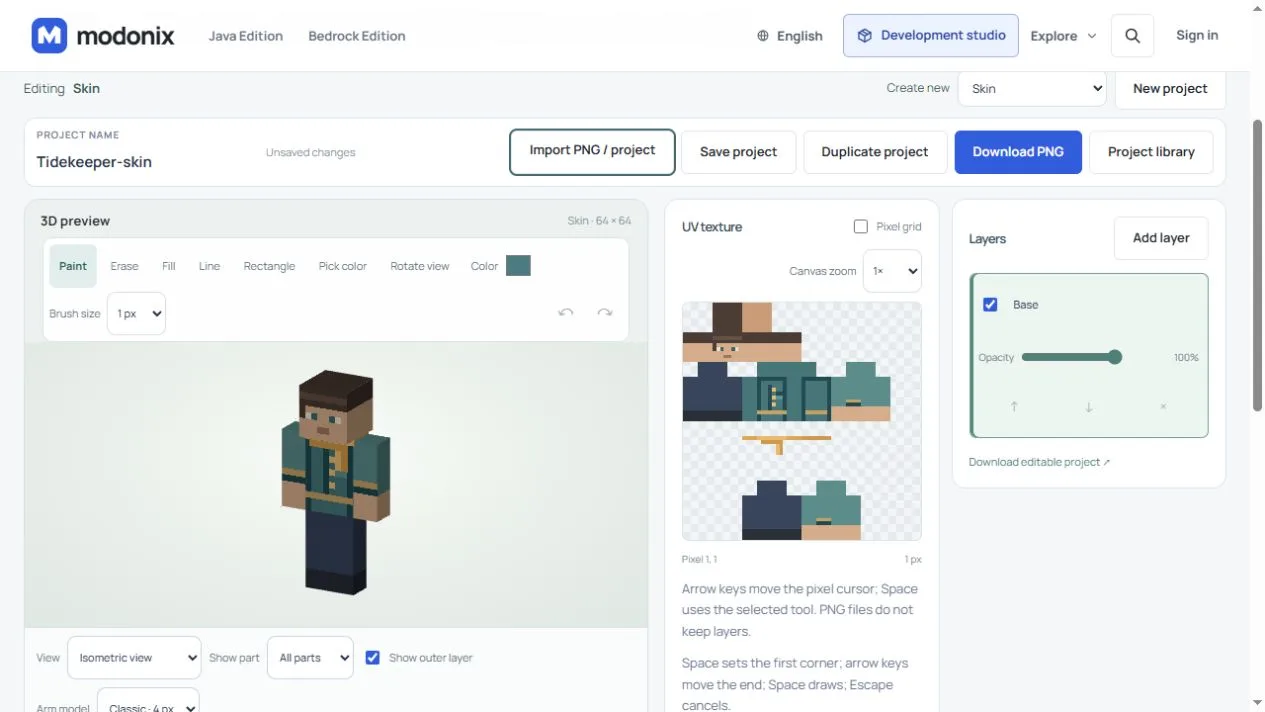
Before the final export, check the document layers you want included, look at the front and back, and use Download PNG. Keep the arm-model choice alongside that file: this PNG export does not store the editor's Classic or Slim setting. Your .modonix.json remains the file to reopen when the next color change comes along.
Comments 0
Share what worked, ask for help or reply to another player.
Use your Modonix account to join the discussion and manage your comments.
Sign in to commentNo comments yet. Share what worked for you.