
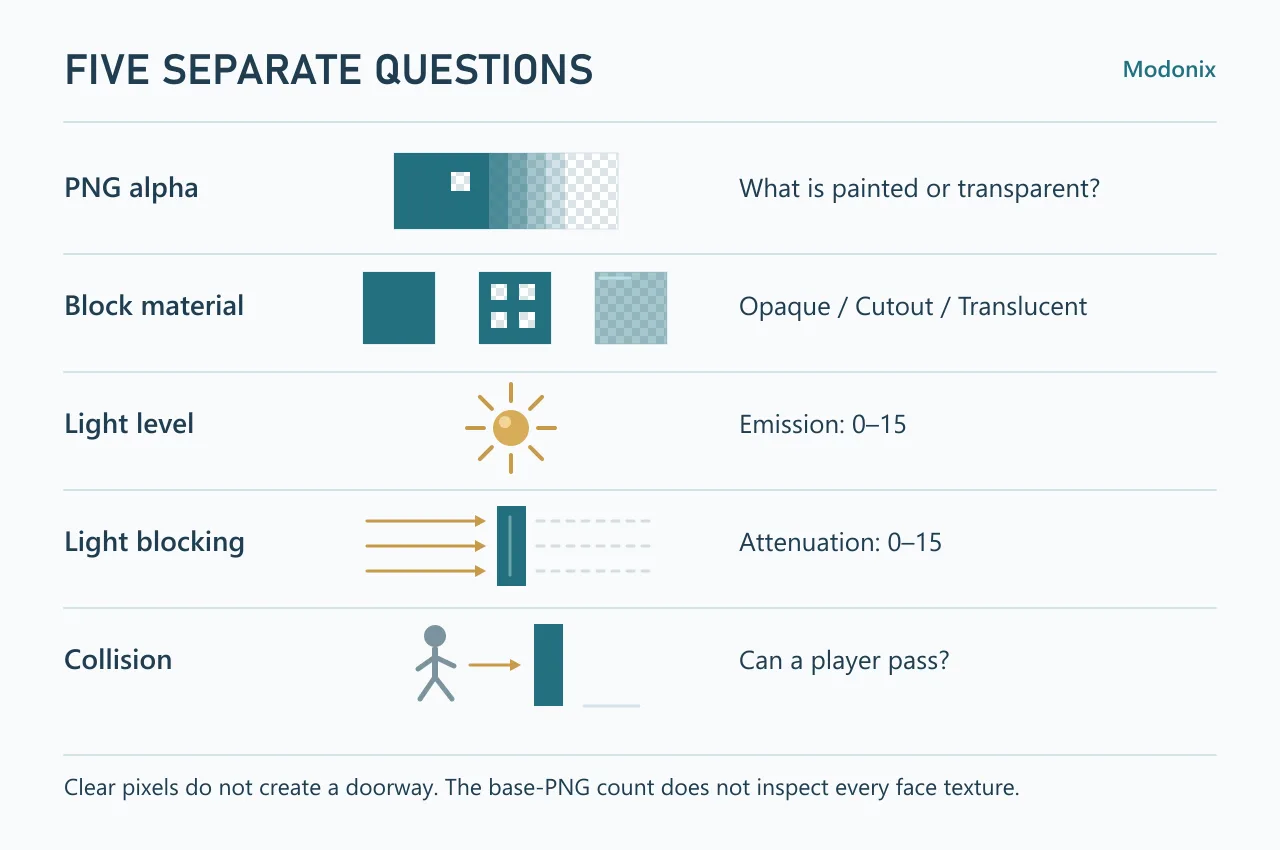
A clear pixel, a glowing block and a hole you can walk through describe different things. Start by deciding what your block should look like, then set its light and collision separately.
Find one clear pixel
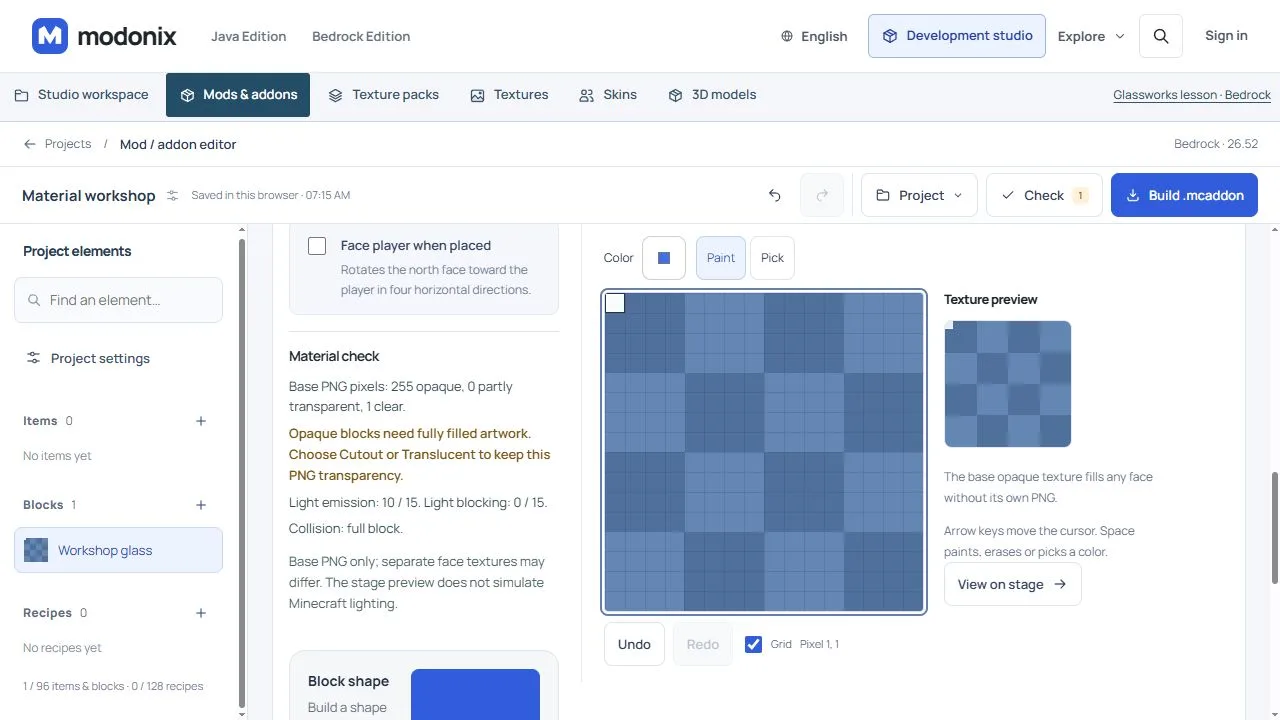
In a copy of a block project, use a fully filled 16×16 base texture. Open Material check in the constructor: the starting image has 256 opaque pixels. Erase one pixel completely in the texture editor and apply the changed artwork to the block. The base PNG summary should now read 255 opaque, 0 partly transparent and 1 clear.
Keep Block material on Opaque to see why the warning matters: this material expects filled artwork. The count describes the base PNG; inspect any separate face textures yourself.
Choose how the image is drawn
- Opaque suits a solid painted surface.
- Cutout suits crisp openings, such as a metal lattice. Pixels become solid or invisible; soft opacity is not its purpose.
- Translucent suits partly transparent color, such as tinted glass. A fully clear pixel remains clear; choosing this material does not add tint or paint missing artwork.
For a soft glass patch, paint partly transparent pixels in the texture studio and check that the summary includes them. Keep an editable copy so you can change the artwork without rebuilding the whole texture.
Give a workshop window three different jobs
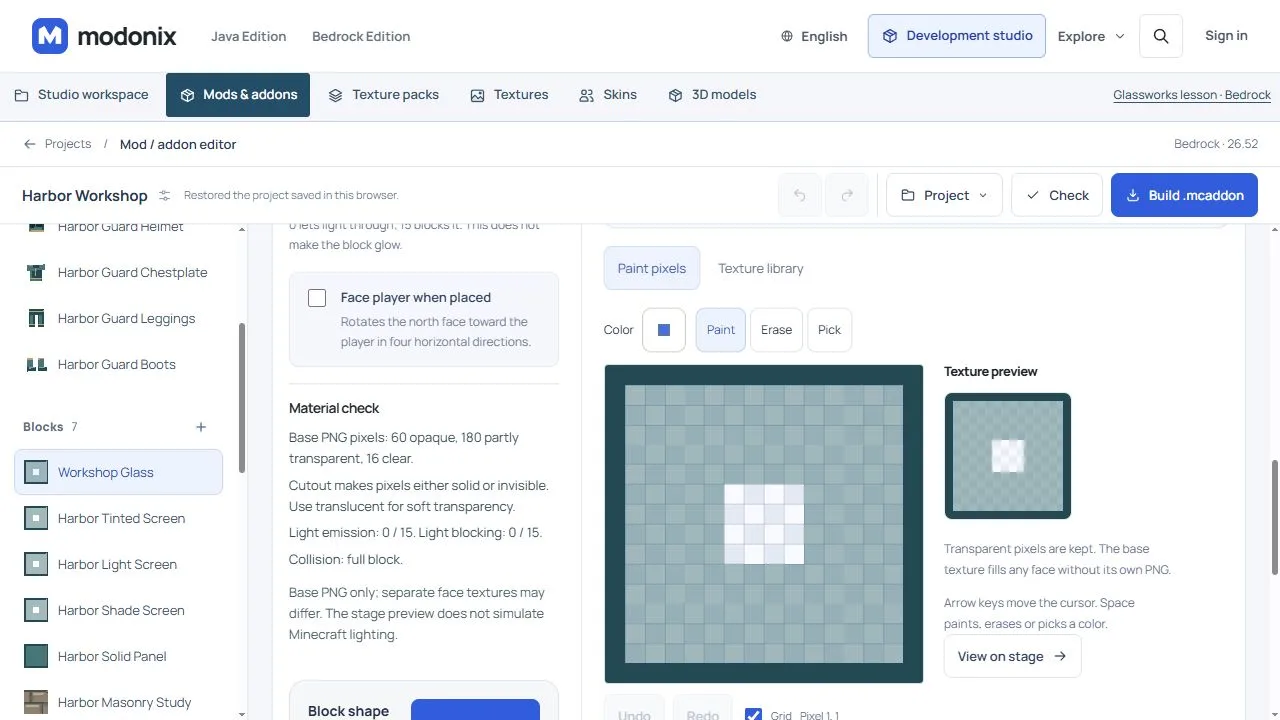
The Harbor screen is a useful small example: a dark frame, a partly transparent teal center and a clear opening. Its 16×16 image contains 60 opaque pixels, 180 partly transparent pixels and 16 clear pixels. The editable art keeps Frame at 100% opacity and Tint at 50%.
To make the artwork yourself, fill Tint with teal #477679. On Frame, use a 1 px Rectangle from Pixel 1,1 to Pixel 16,16 in #234953. Return to Tint and make the central opening with a 4 px Erase centered at Pixel 9,9. Keep both layers visible and save the art before copying it into a block.
- Select Cutout before using Copy saved texture for Workshop Glass. Read Material check, confirm the three pixel counts, and leave Light level: 0 and Light blocking: 0.
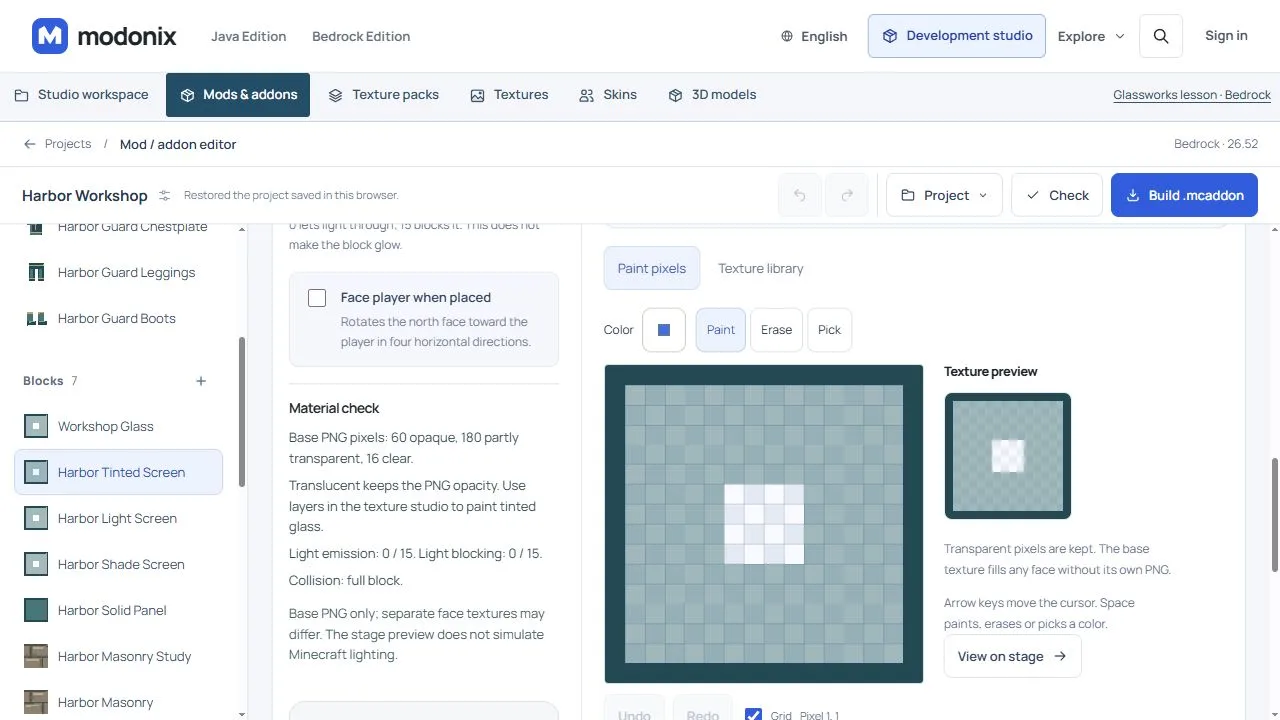
- Copy the same saved artwork into Harbor Tinted Screen with Translucent selected. Keep both light values at 0. The pixels are the same; the drawing rule is the change to compare.
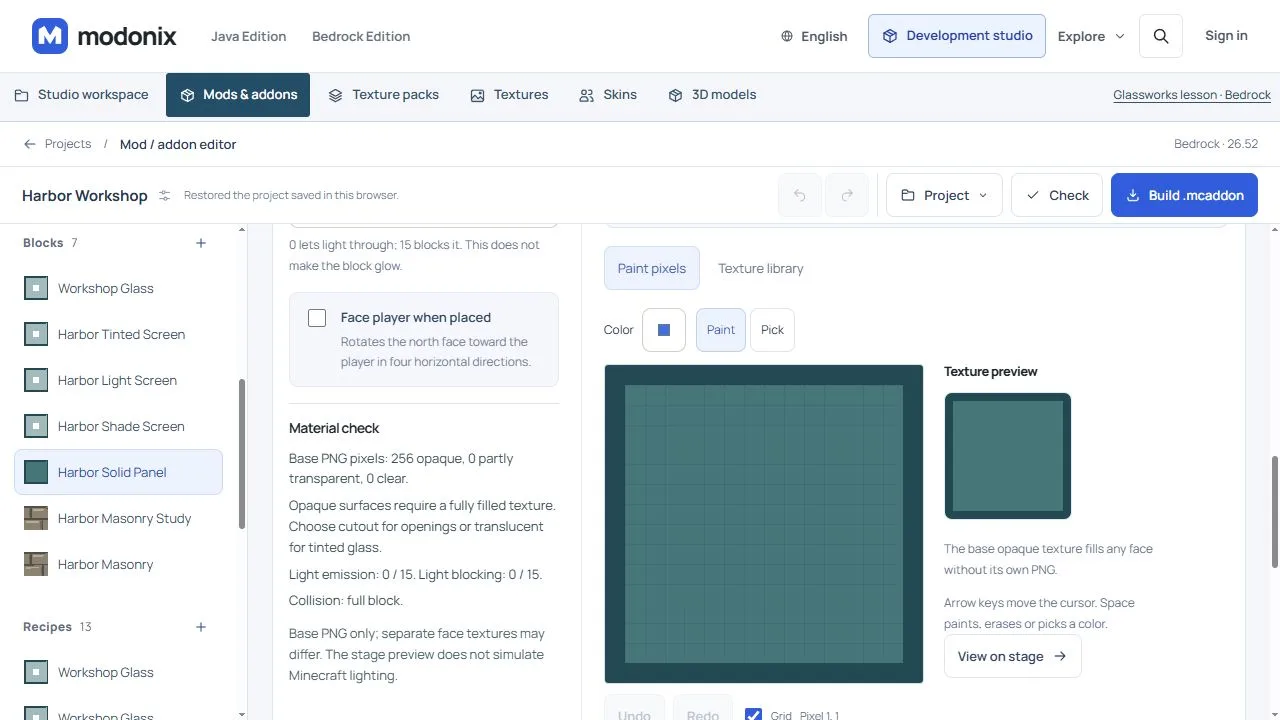
For a filled panel in the same palette, keep the screen source and duplicate the artwork as a separate document. Set Tint to 100%, then Fill the clear opening with the same teal. Harbor Solid Panel uses this filled version: 256 opaque pixels. It is related artwork, not the same alpha image displayed in a third mode. Trying to use the partly transparent screen as Opaque is the wrong shortcut; the editor requires fully filled art.
Keep the choices easy to compare:
| Block | Artwork and setting to inspect | Light level | Light blocking |
|---|---|---|---|
| Workshop Glass | Harbor screen; Cutout | 0 | 0 |
| Harbor Tinted Screen | Same Harbor screen; Translucent | 0 | 0 |
| Harbor Light Screen | Same Harbor screen; Translucent | 10 | 0 |
| Harbor Shade Screen | Same Harbor screen; Translucent | 0 | 15 |
| Harbor Solid Panel | Separate fully filled artwork | 0 | 0 |
Use the tinted screen as the starting point for the two light examples. For Harbor Light Screen, change only Light level to 10 and keep blocking at 0. For Harbor Shade Screen, keep emission at 0 and change only Light blocking to 15. Save and reopen each block to check the values, rather than relying on the color of its preview.
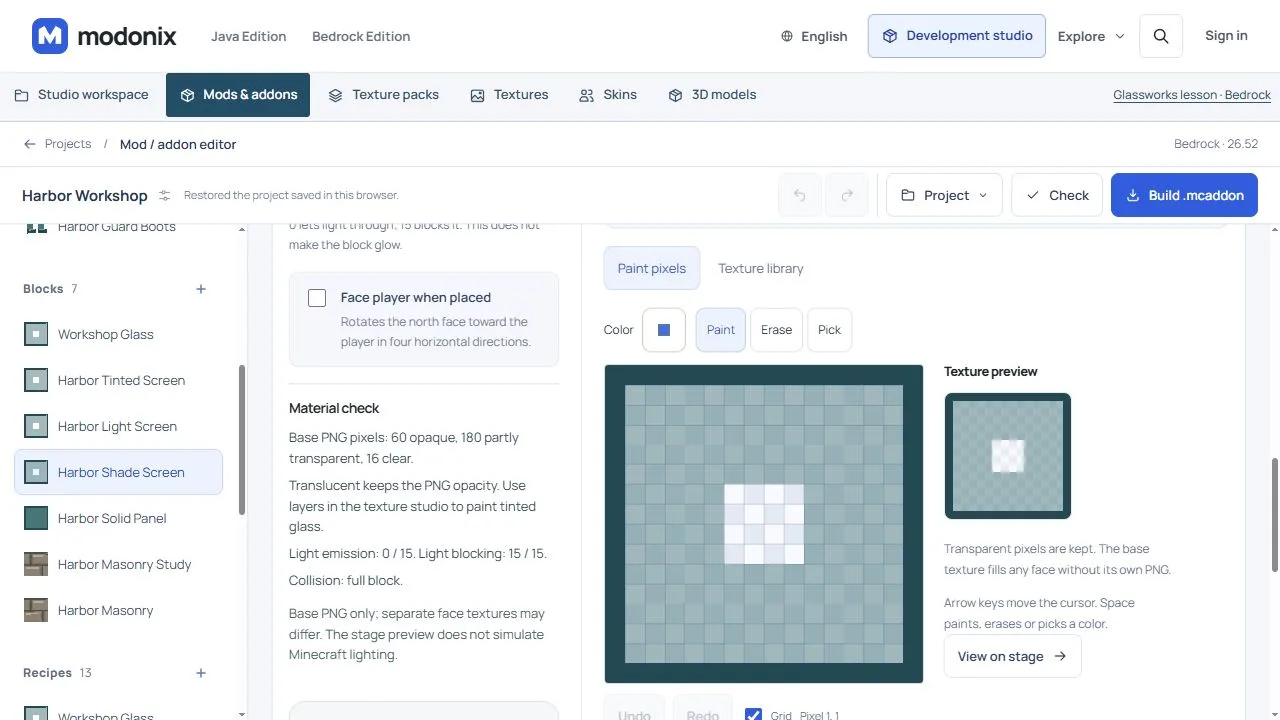
For a workbench corner, plan a framed window, a light-emitting accent and a shade panel as separate jobs. The filled panel is useful as a visual reference, but its blocking value here is still 0: looking solid does not automatically make it a light barrier. Keep the collision decision separate too. Before using the set across a room, compare the window blocks against the same background, check movement against the full block, and compare each light change at the same position with the same surrounding light.
Set the two light controls independently
Try Light level: 10 and Light blocking: 0 as a settings exercise. The first sets emitted light; the second controls how much light passing through the block is reduced. Both use 0–15. Raising light blocking does not make the block glow, and choosing a transparent material is not a substitute for reviewing these fields.
Collision is another decision. Transparent glass can still stop a player. Check the intended collision shape; do not erase PNG pixels to create a doorway.
Turn the exercise into a useful block
The existing Java Glassworks lesson provides separate examples: the lattice has clear openings, Smoke Glass retains a solid collision, and the Opal Lantern emits light. Use those roles to plan a window, screen or lamp of your own.
Save and reopen the project to review the texture and both light values. Before distributing your export, inspect the block from both sides, place it beside a lit and an unlit area, and check movement against its collision. The material panel helps you choose settings; the exported block still needs that game check.
Comments 0
Share what worked, ask for help or reply to another player.
Use your Modonix account to join the discussion and manage your comments.
Sign in to commentNo comments yet. Share what worked for you.