
Start a pack transfer by listing what is inside it. A PNG wall texture, an animated surface and a scripted block need different work, even when they came from the same download.
Plan your pack transfer makes a checklist from your choices. It does not inspect uploaded files, convert an archive or confirm that a pack works in another edition.
Make a small plan first
Choose Source edition, Target edition and the relevant Pack contents, then select Build transfer plan. The editions must differ. If you accidentally select Bedrock for both, correct the target and submit again; an invalid selection is not a transfer report.
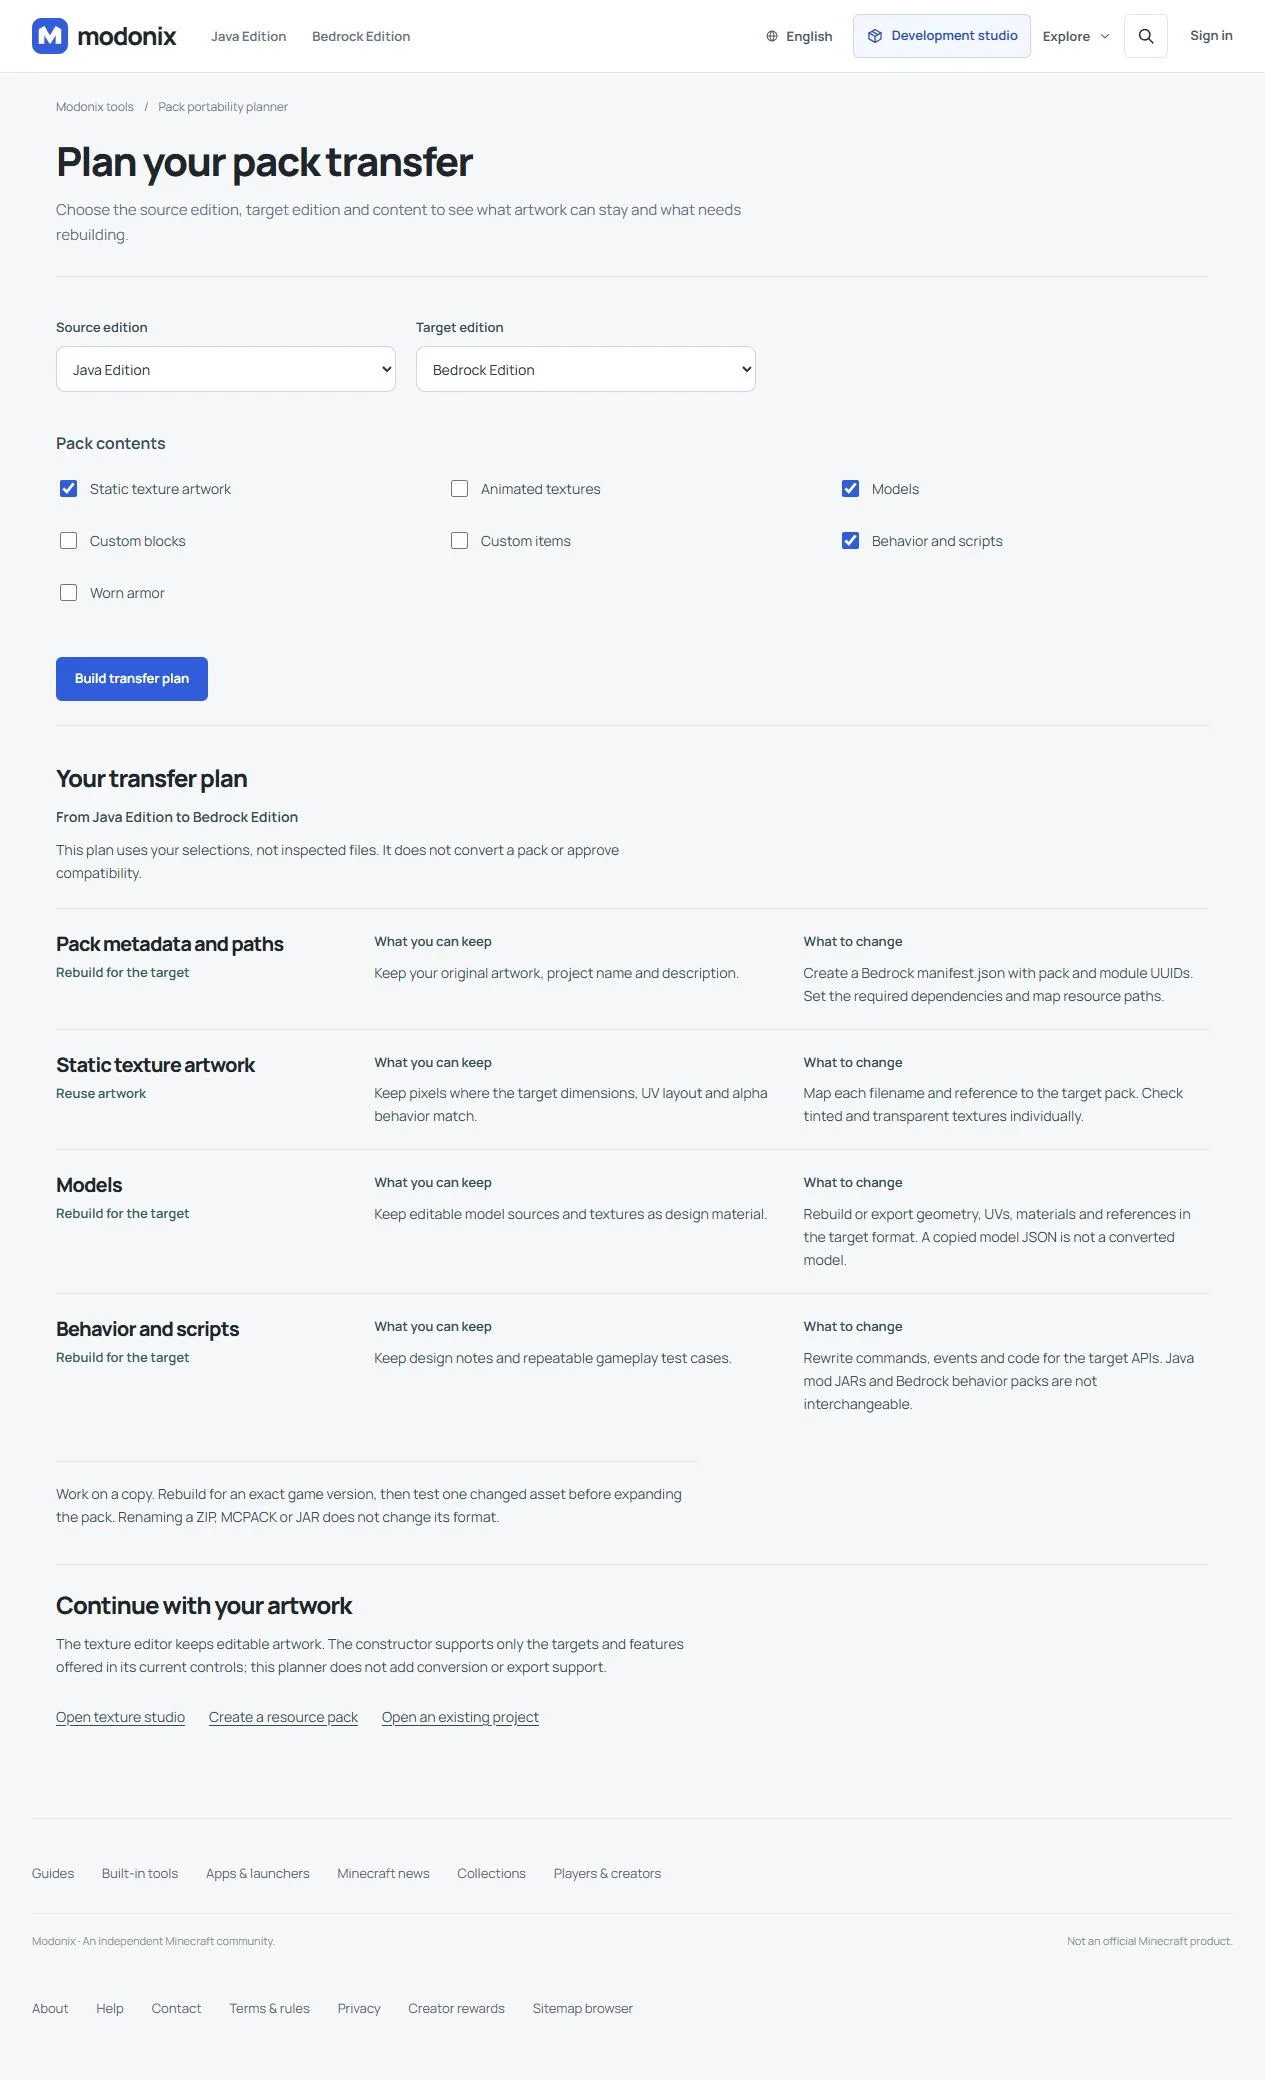
For a Java-to-Bedrock workshop pack with static masonry textures, a custom lamp model and behavior, select Static texture artwork, Models and Behavior and scripts. Read the plan as four jobs, including pack metadata:
| Part | First useful action |
|---|---|
| Static artwork | Keep an editable original; check target dimensions, UV layout and alpha before reusing its PNG. |
| Model | Rebuild the target model and its texture/material references. Copying the model JSON is not a conversion. |
| Behavior | Reimplement the feature for the target API. A Java JAR does not become a Bedrock behavior pack. |
| Pack metadata | Build the target manifest, identifiers and file paths. Renaming the archive is insufficient. |
Reverse the direction deliberately
For a Bedrock-to-Java pack containing an animated texture and worn armor, select those two categories. The plan adds work for animation configuration and armor geometry, UVs, materials and equipment references. Java texture animation uses accompanying .mcmeta files; Bedrock uses flipbook_textures.json. Reusing the painted frames does not automatically recreate their timing or references.
Choose the exact target game version before writing metadata. A resource pack can replace supported visual assets; it does not by itself recreate every custom block, item or behavior. The planner's categories also do not add export targets or features to the constructor.
Prove one asset before expanding
Pick one ordinary wall texture as the first checkpoint. Map its target name and location, package a minimal copy, then inspect it in the target game. Check its seams, orientation and any transparency before adding models or behavior. The single-block texture guide shows how keeping that first change small helps isolate problems.
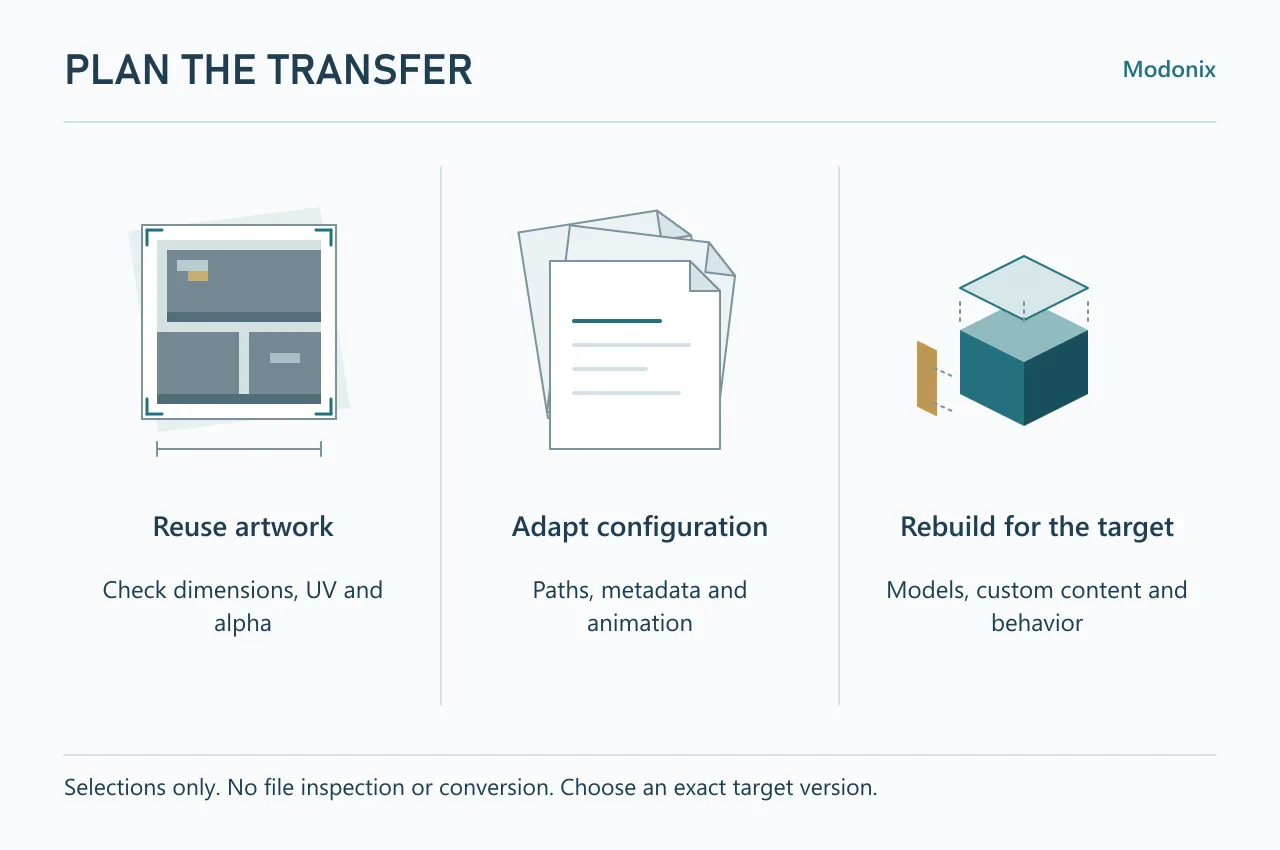
Keep a three-column note: reuse artwork, adapt configuration, rebuild for the target. A successful image replacement clears only that image's task. Continue to models, recipes and behavior separately; a completed checklist is a work plan, not a compatibility certificate.
Work through one masonry drawing
Take a wall pattern you have painted and make two separate resource projects around it. For this example, we used Harbor's opaque 16 × 16 masonry artwork and chose Stone as the replacement in each project. The goal is specific: reuse the drawing on ordinary Stone. This does not transfer the Harbor custom block, its identifier or its recipe.
Keep the editable artwork document as well as its PNG. The PNG supplies the finished pixels; it does not bring the original drawing layers into the replacement editor.
Prepare the Java source pack
In the constructor, create a Resource pack project for Java and give it a distinct project name. Leave custom items, blocks and recipes empty for this first transfer.
- Choose Stone in Texture to replace, then select Add replacement.
- Open Import PNG and select your masonry image.
- Check that the preview shows the intended drawing, then select Apply appearance. Closing the editor with Cancel would discard the pending change.
- Use Save project JSON to keep an editable copy. Run Check, then Build .zip and download the finished Java export.
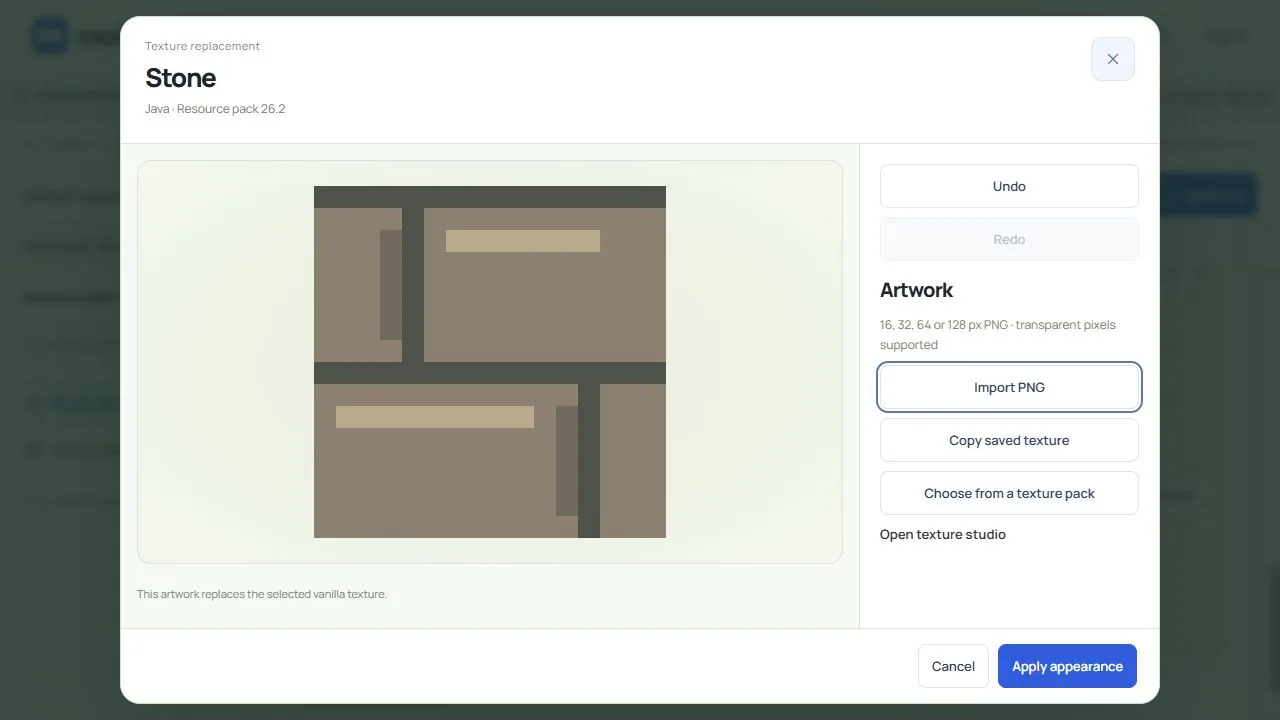
Our Java export contains the masonry image at assets/minecraft/textures/block/stone.png. That location belongs to the Java resource layout. It gives us a precise image to select for the second project.
Pick that image for Bedrock
Save the Java project before starting a separate Bedrock Resource pack project. Give the Bedrock copy its own project name rather than overwriting the Java source. Choose Stone in Texture to replace, then select Add replacement to open its appearance editor.
- Select Choose from a texture pack, then Choose texture pack.
- Open the Java ZIP you just downloaded. Search for
stoneif the pack contains several images. - Select the masonry Stone image. In this small export there is one matching PNG; in a larger pack, check the image and its path instead of selecting every result.
- Select Import selected. Check the Stone preview, then choose Apply appearance.
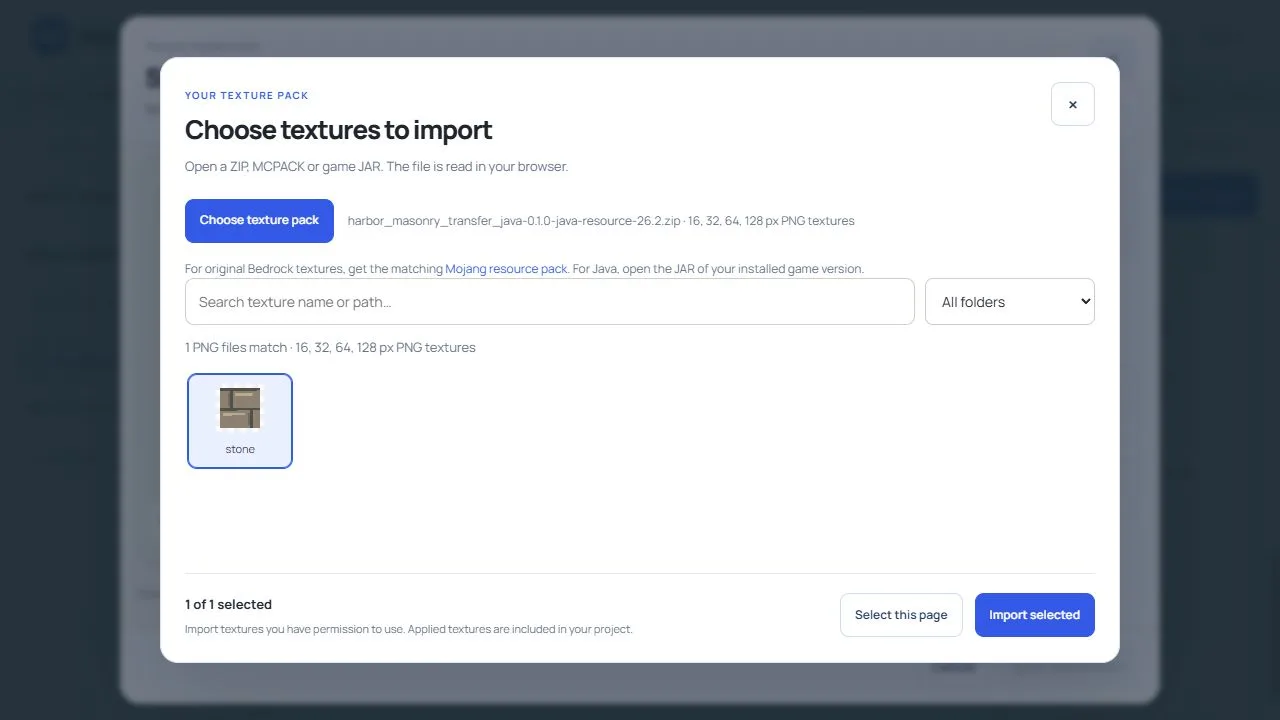
The picker takes the selected image from the ZIP. It does not import the Java project, its metadata or a whole add-on into Bedrock. That is why we created the target resource project first.
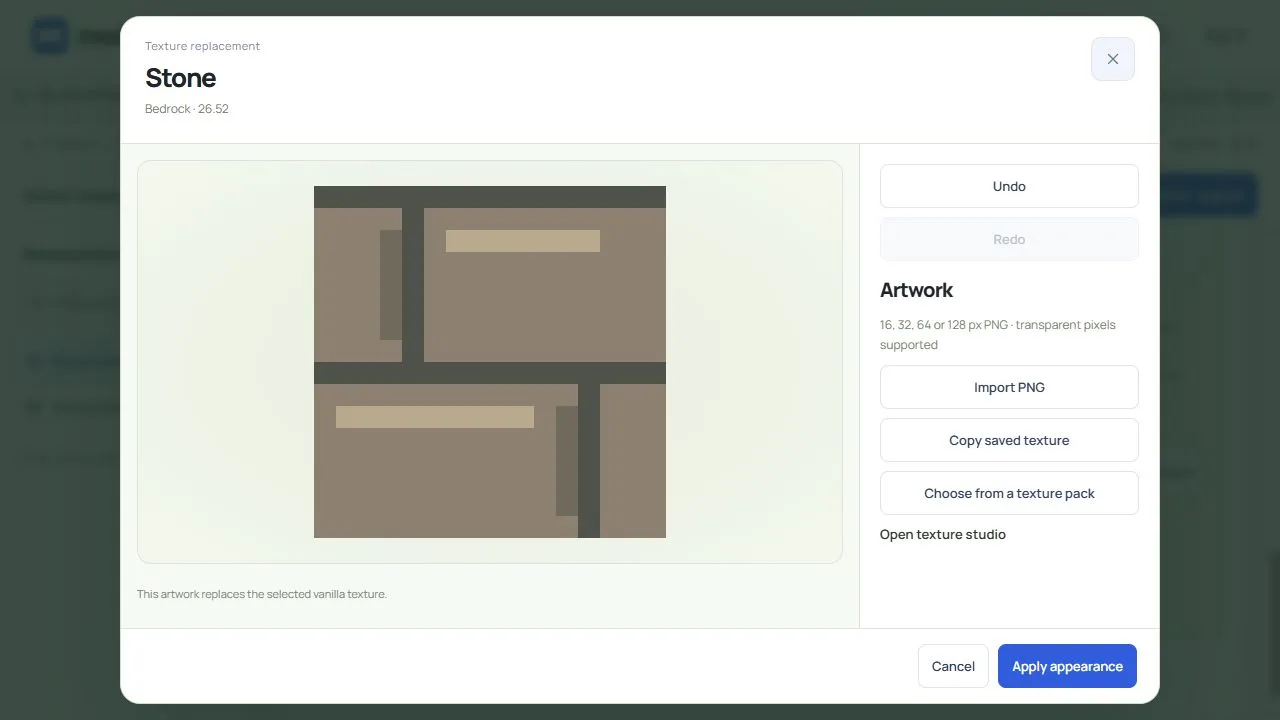
Save the Bedrock project JSON separately. Run Check, then Build .mcpack and download that export. Keep the two editable project files with clear Java and Bedrock names so later changes stay in the intended project.
Check what moved, and what did not
Both downloaded packs contain exactly the same 16 × 16 masonry PNG. The constructor has placed those pixels in different resource layouts:
| Export | The selected Stone artwork | Pack information |
|---|---|---|
| Java | assets/minecraft/textures/block/stone.png |
pack.mcmeta |
| Bedrock | textures/blocks/stone.png |
A separate manifest.json and resource module |
This is useful when you want the same wall palette in two editions: paint the artwork once, then maintain the appropriate resource project for each edition. The image does not carry recipes, block behavior, custom models or animation settings with it.
Before expanding the pack, activate the correct export in a copy of your world and examine ordinary Stone in daylight and under a roof. Place a short wall so the repeated joints and corners are visible. If another active pack also replaces Stone, isolate this one first; seeing the older texture is not enough to conclude that the imported PNG disappeared.
Keep the artwork transfer and the in-game result as separate checks. Matching pixels in two downloads do not establish how lighting, pack priority or a different renderer will make the wall look. Once the first wall looks right in the target game, continue with the next texture or tackle a target-specific model as a separate job.
Comments 0
Share what worked, ask for help or reply to another player.
Use your Modonix account to join the discussion and manage your comments.
Sign in to commentNo comments yet. Share what worked for you.